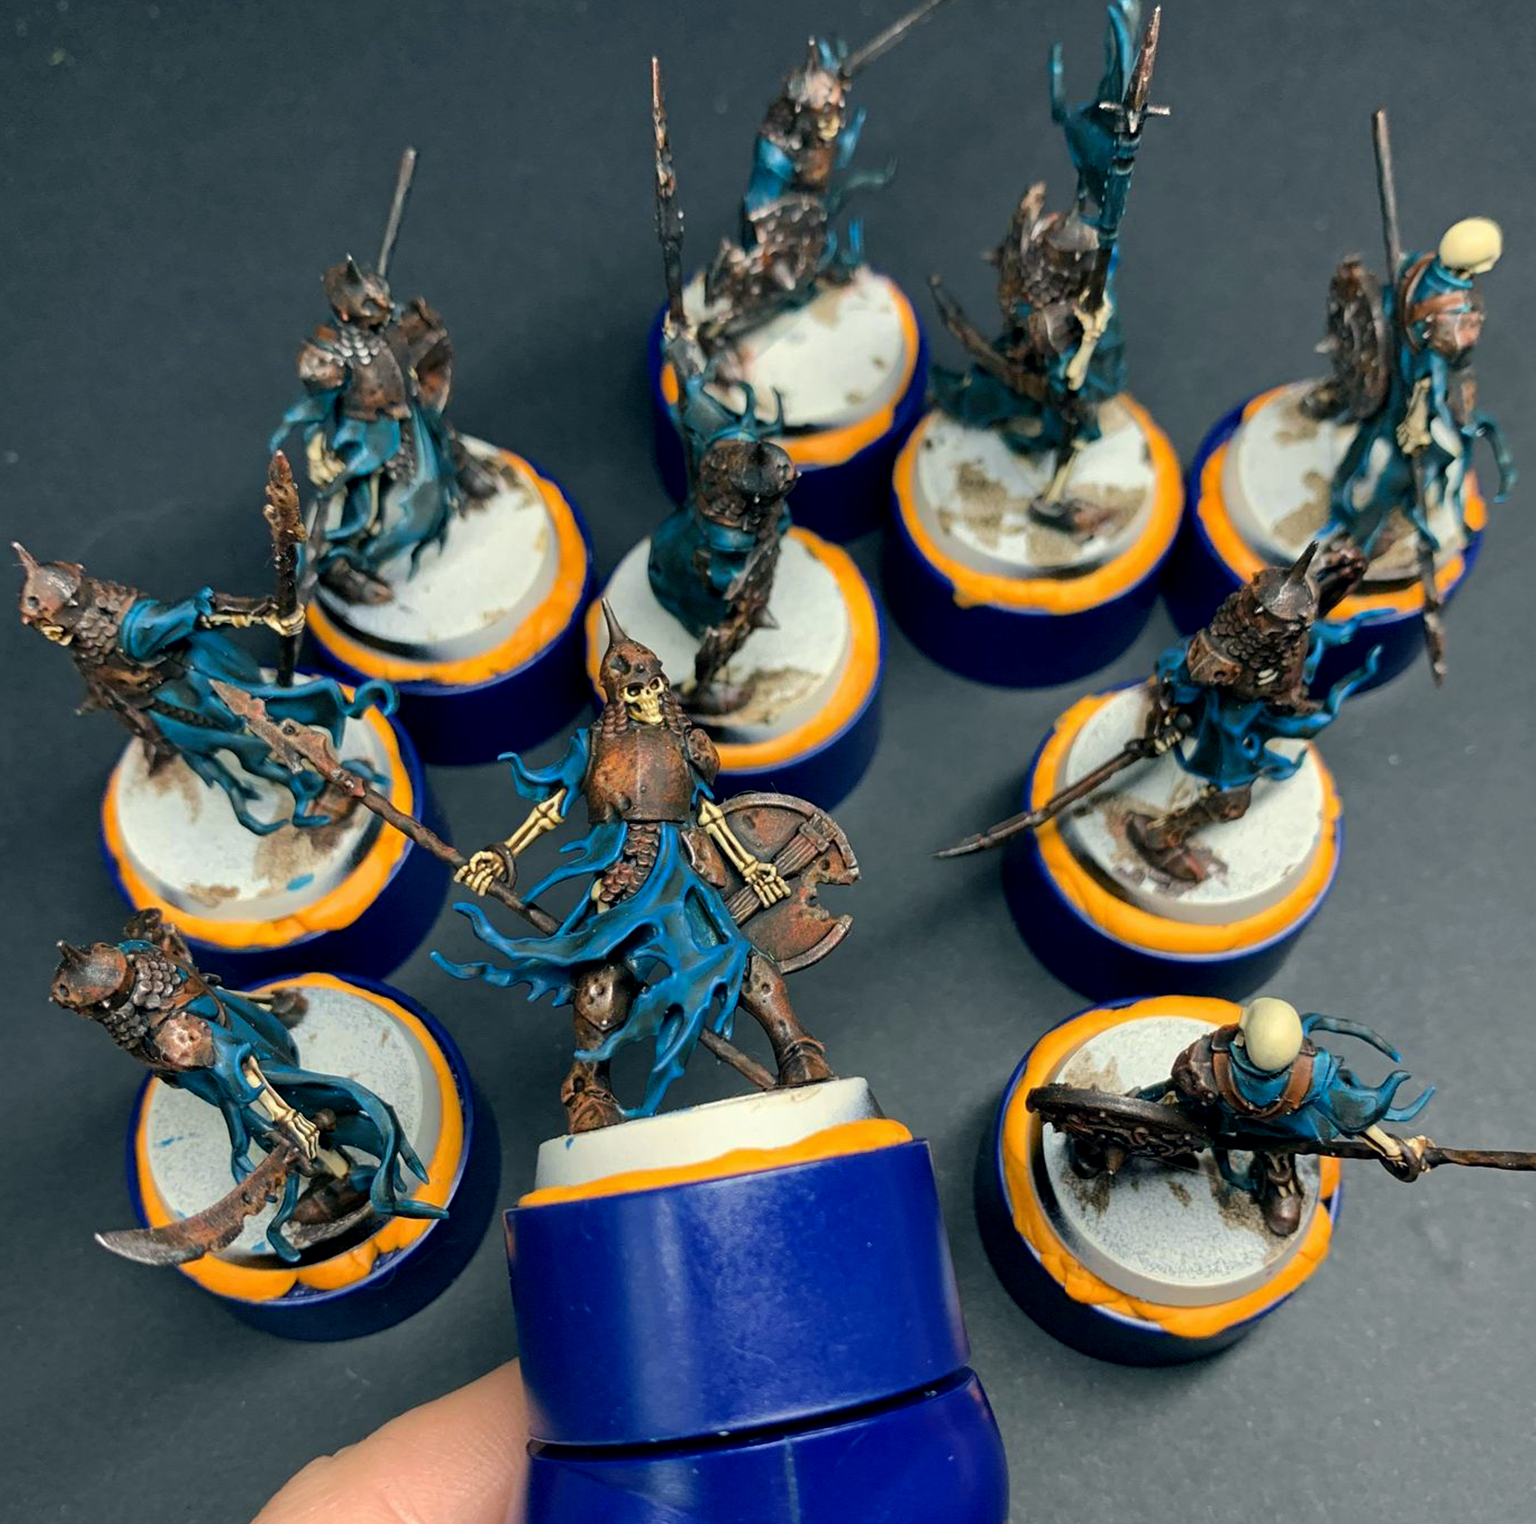
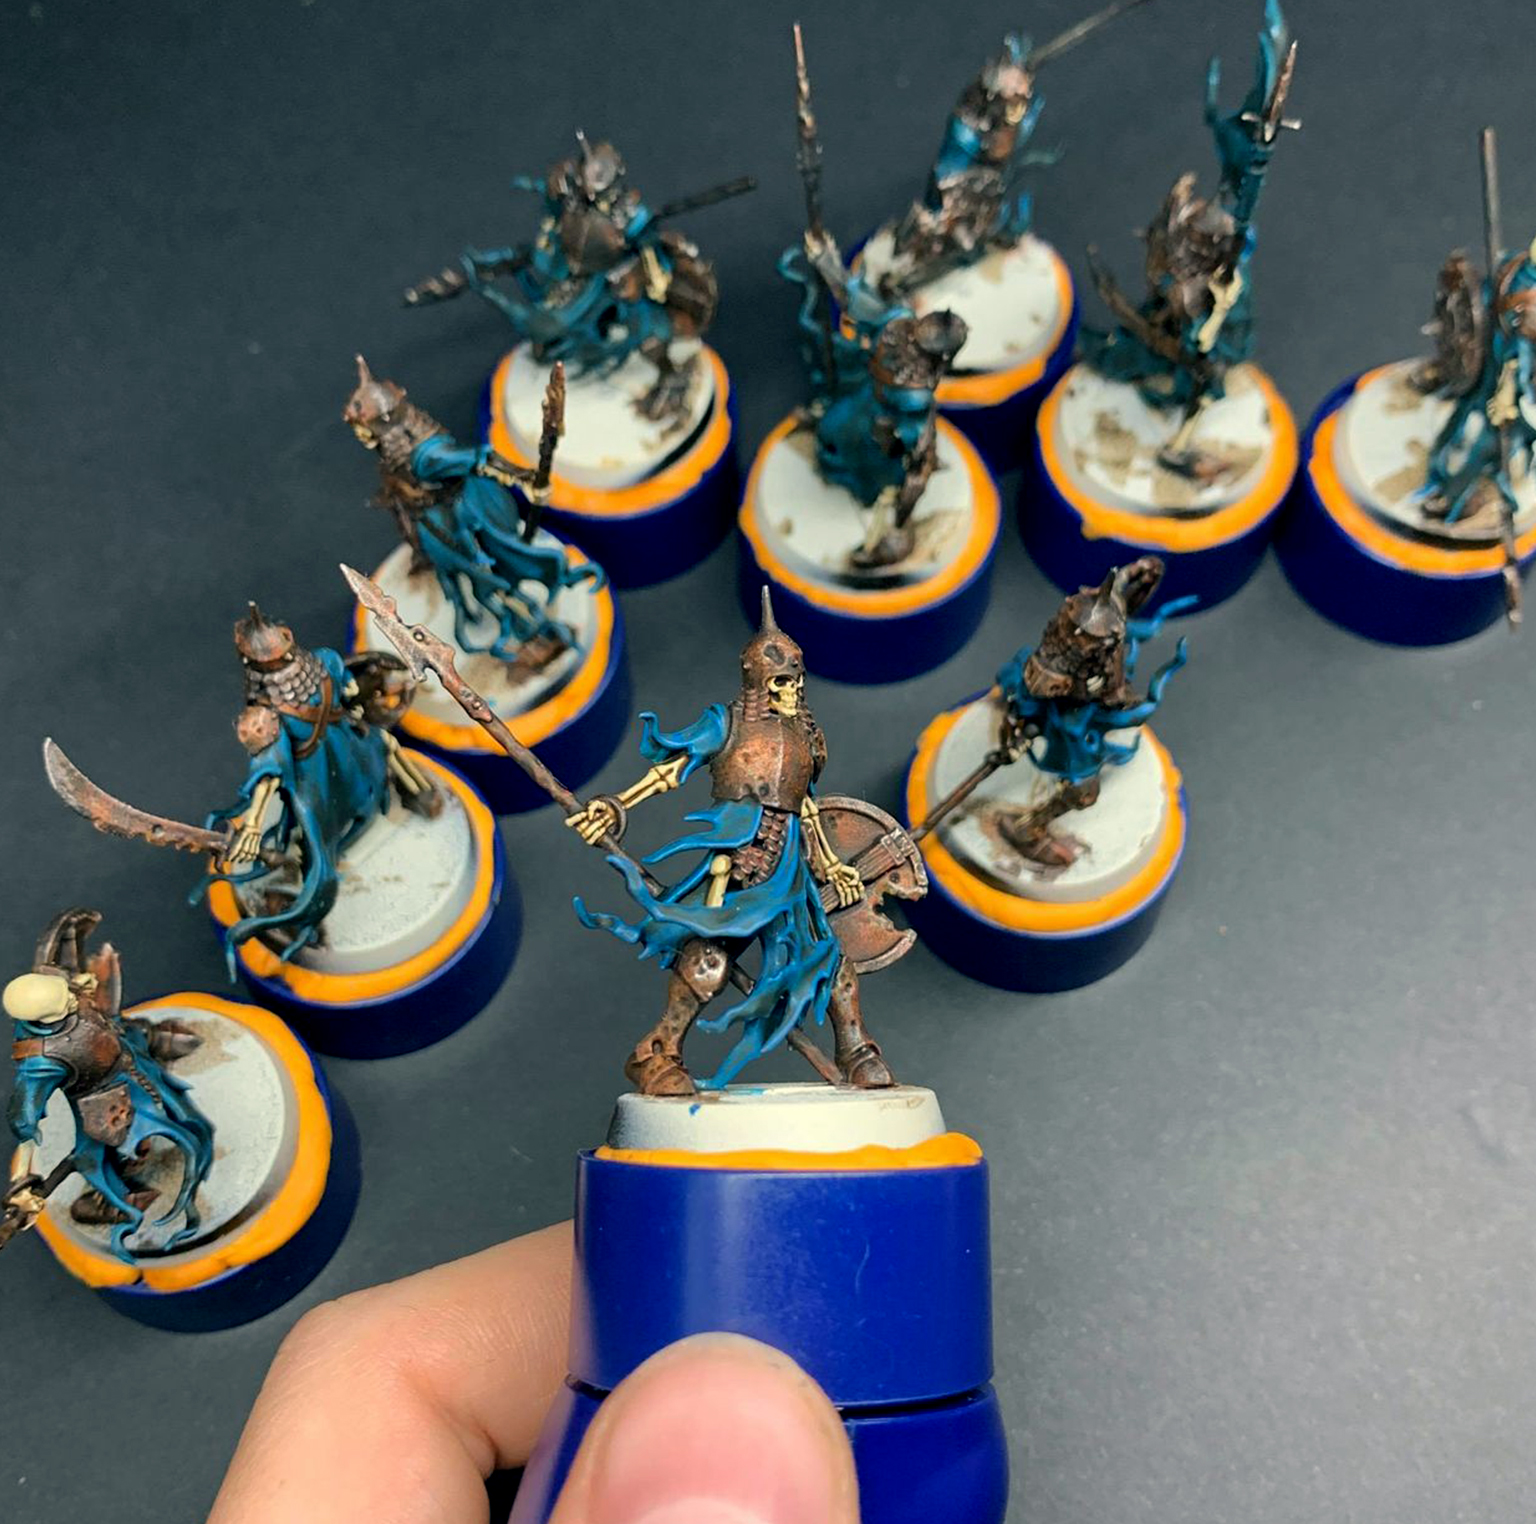
As you may have seen while I’ve been live over on our Twitch channel, I’ve recently been painting a commission set of Cursed City and the Ulfenwatch were the focus for a week or so. On these, I was painting their armour rusty as per the request of the client who also linked me to a really helpful tutorial which, in essence, I’ll be recreating here just with a focus on the models I’ve been painting. For those wanting to see the original tutorial from Realm of Plastic please click here.
This tutorial will focus on the rusty armoured areas of the model not the blue or bone sections of the model, if you want to know a bit more about how I painted that then feel free to drop into the Twitch stream when I’m live and I can answer then! Without further ado, lets get started.
Paints Used
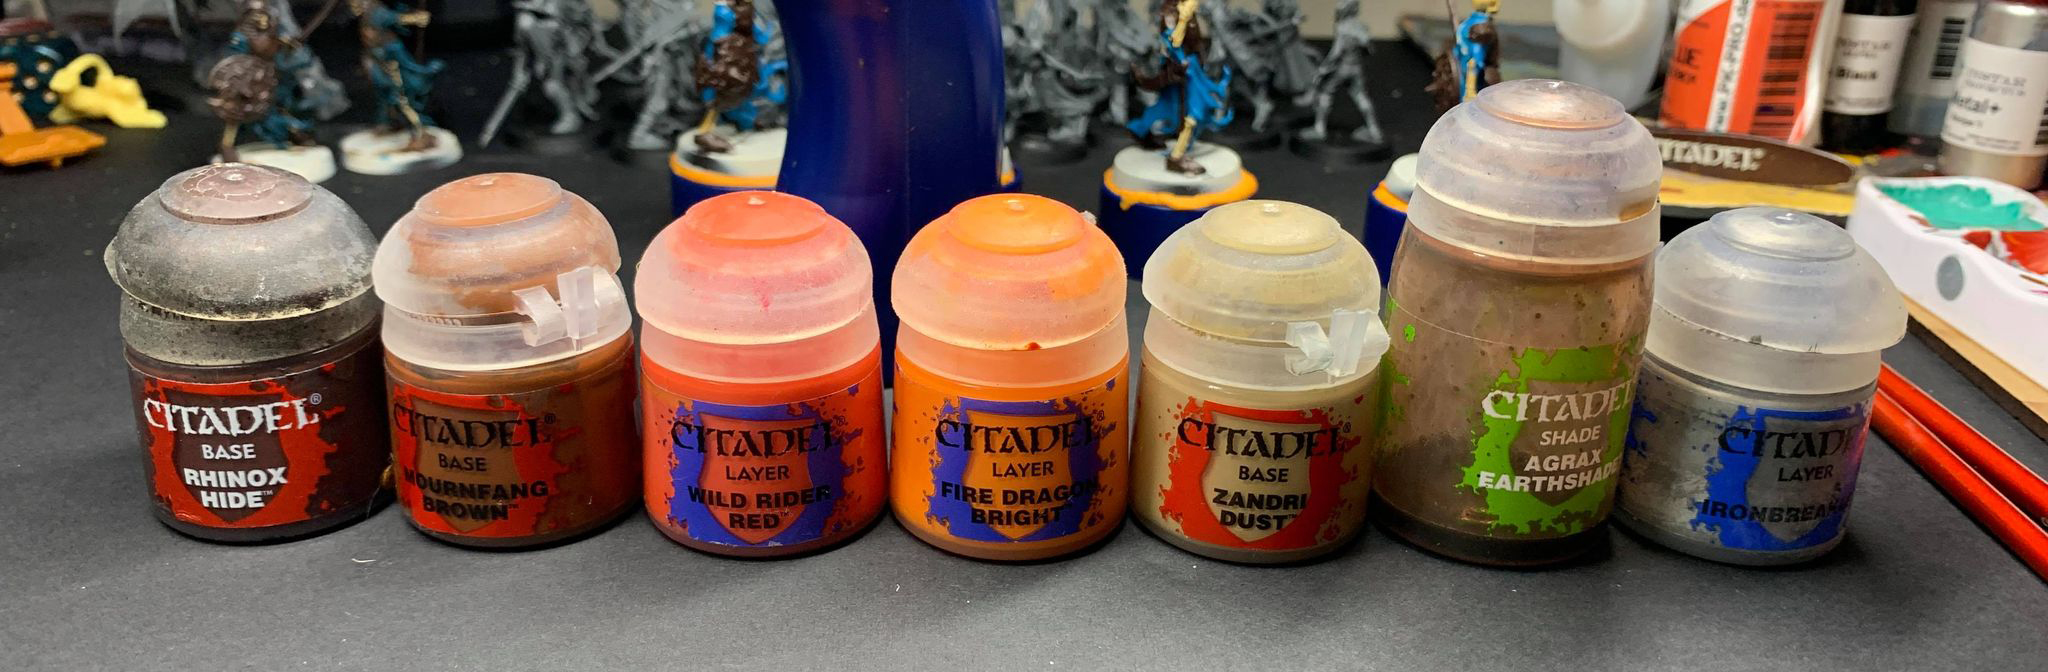
– Rhinox Hide
– Mournfang Brown
– Wild Rider Red
– Fire Dragon Bright
– Zandri Dust
– Agrax Earthshade
– Ironbreaker
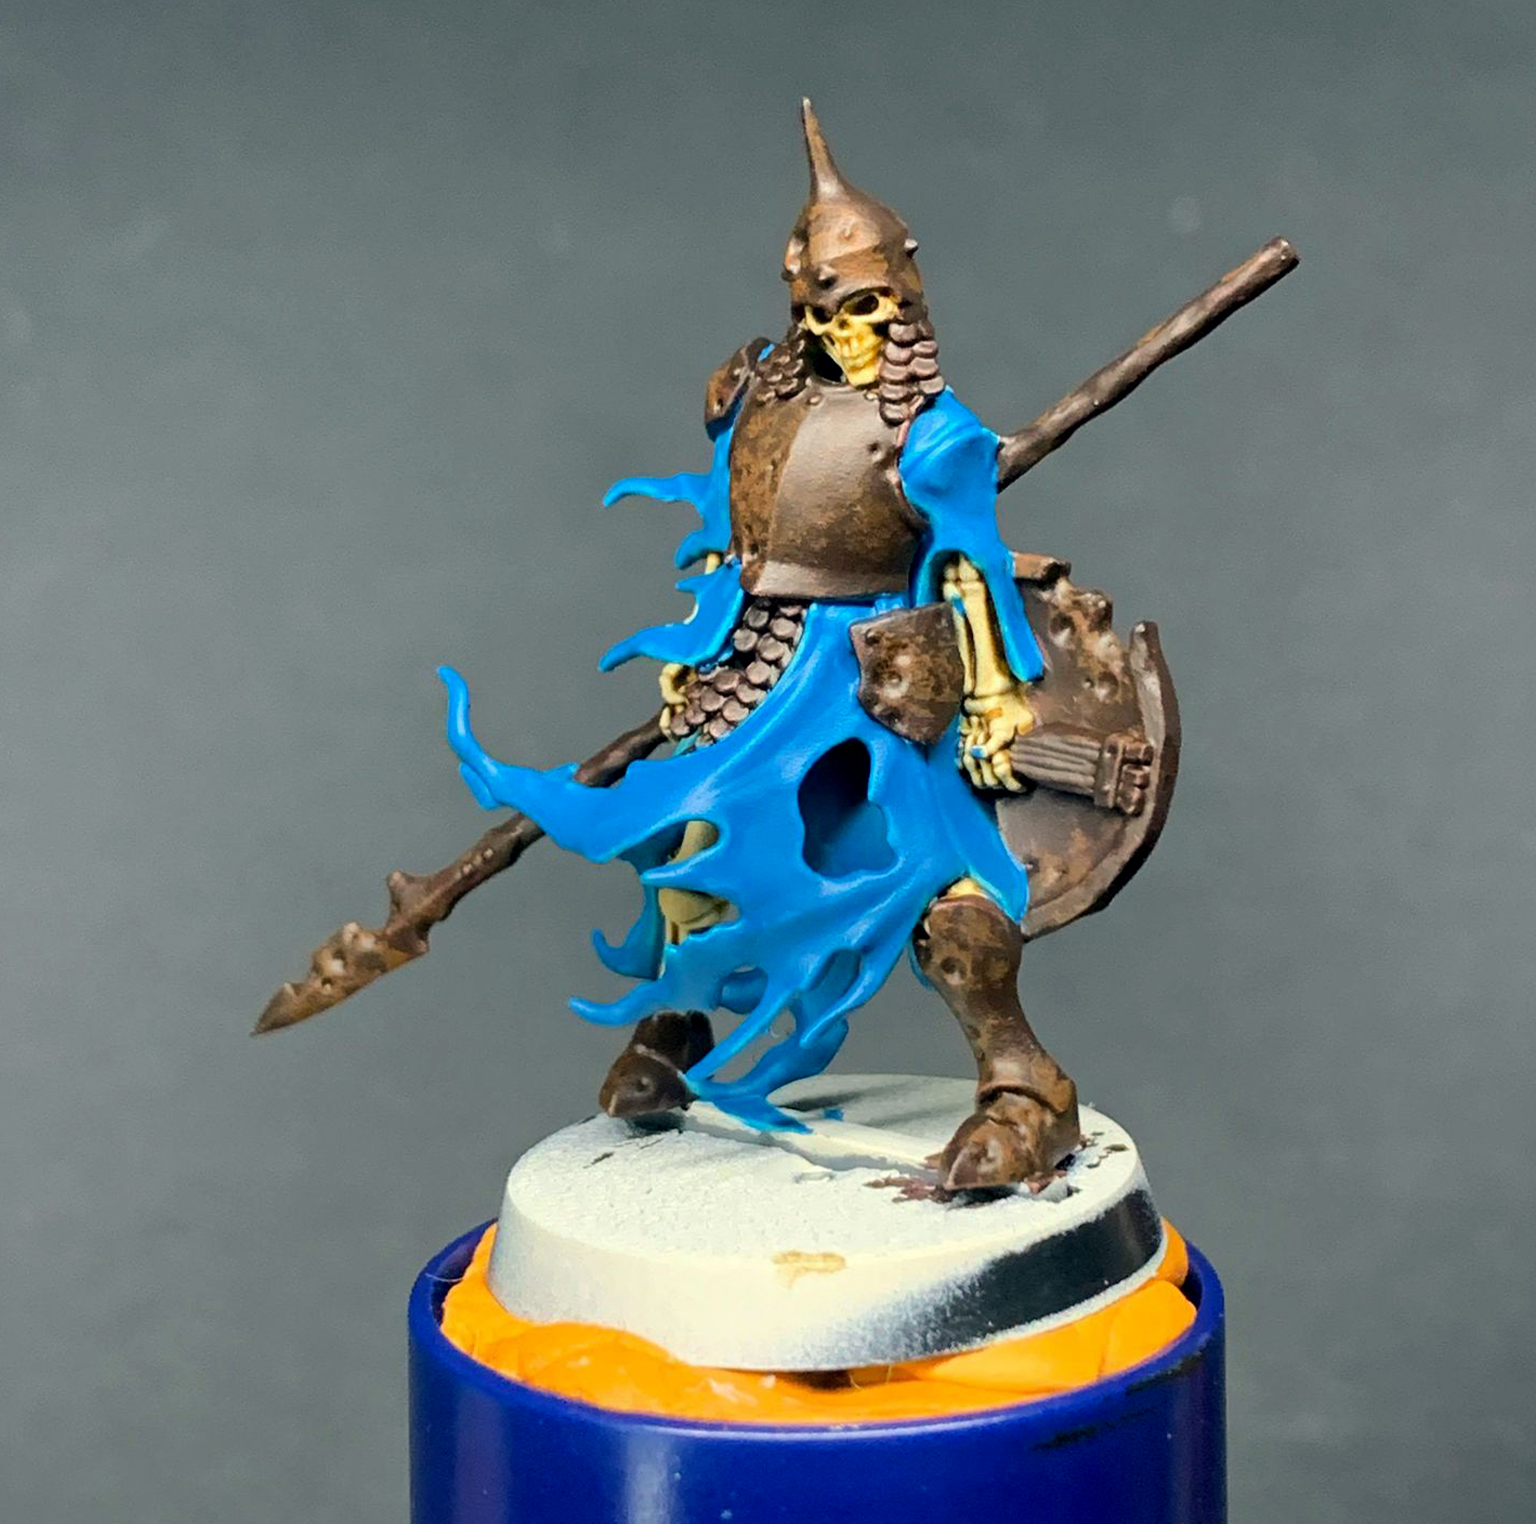
Step 1
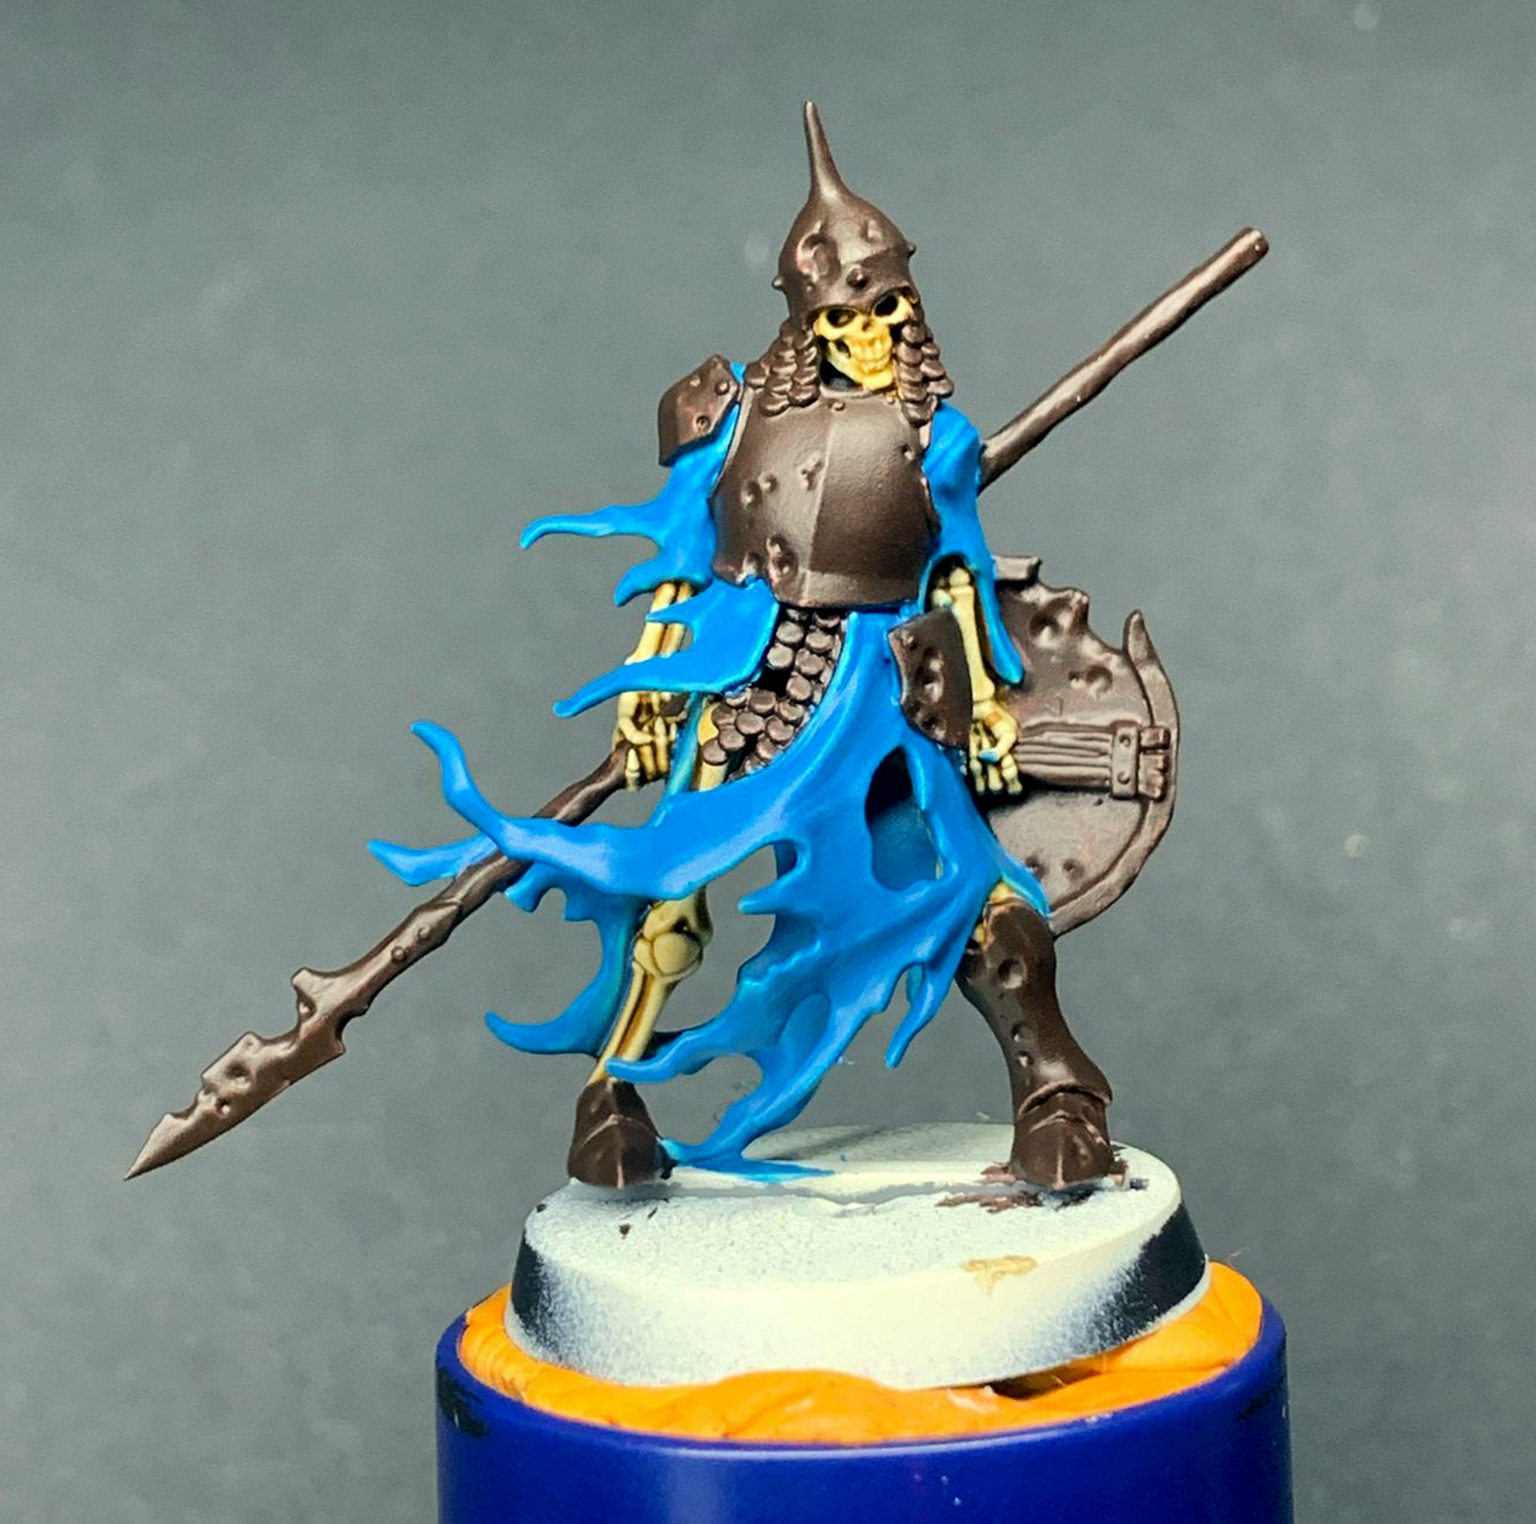
The first thing we want to do is basecoat the sections of your model you want to make rusty armour with Rhinox Hide. This can take a couple of thin coats to get a nice smooth finish.
Step 2
The next thing is to stipple the whole model heavily with Mournfang Brown leaving some areas of the Rhinox Hide visible. For those wondering, stippling is when you have a moderate amount of paint on the brush, load up like you would with layering, then take some off the brush. you want to dab the paint directly onto the model at a 90-degree angle and repeatedly jab.
Step 3

You know that stipple method in Step 2? Yup! That again for this step but this time with Wild Rider Red, although instead of going hell for leather and not caring about where the paint lands, this time, aim to apply the paint to specific areas you want the rust to be most prominent.
Step 4
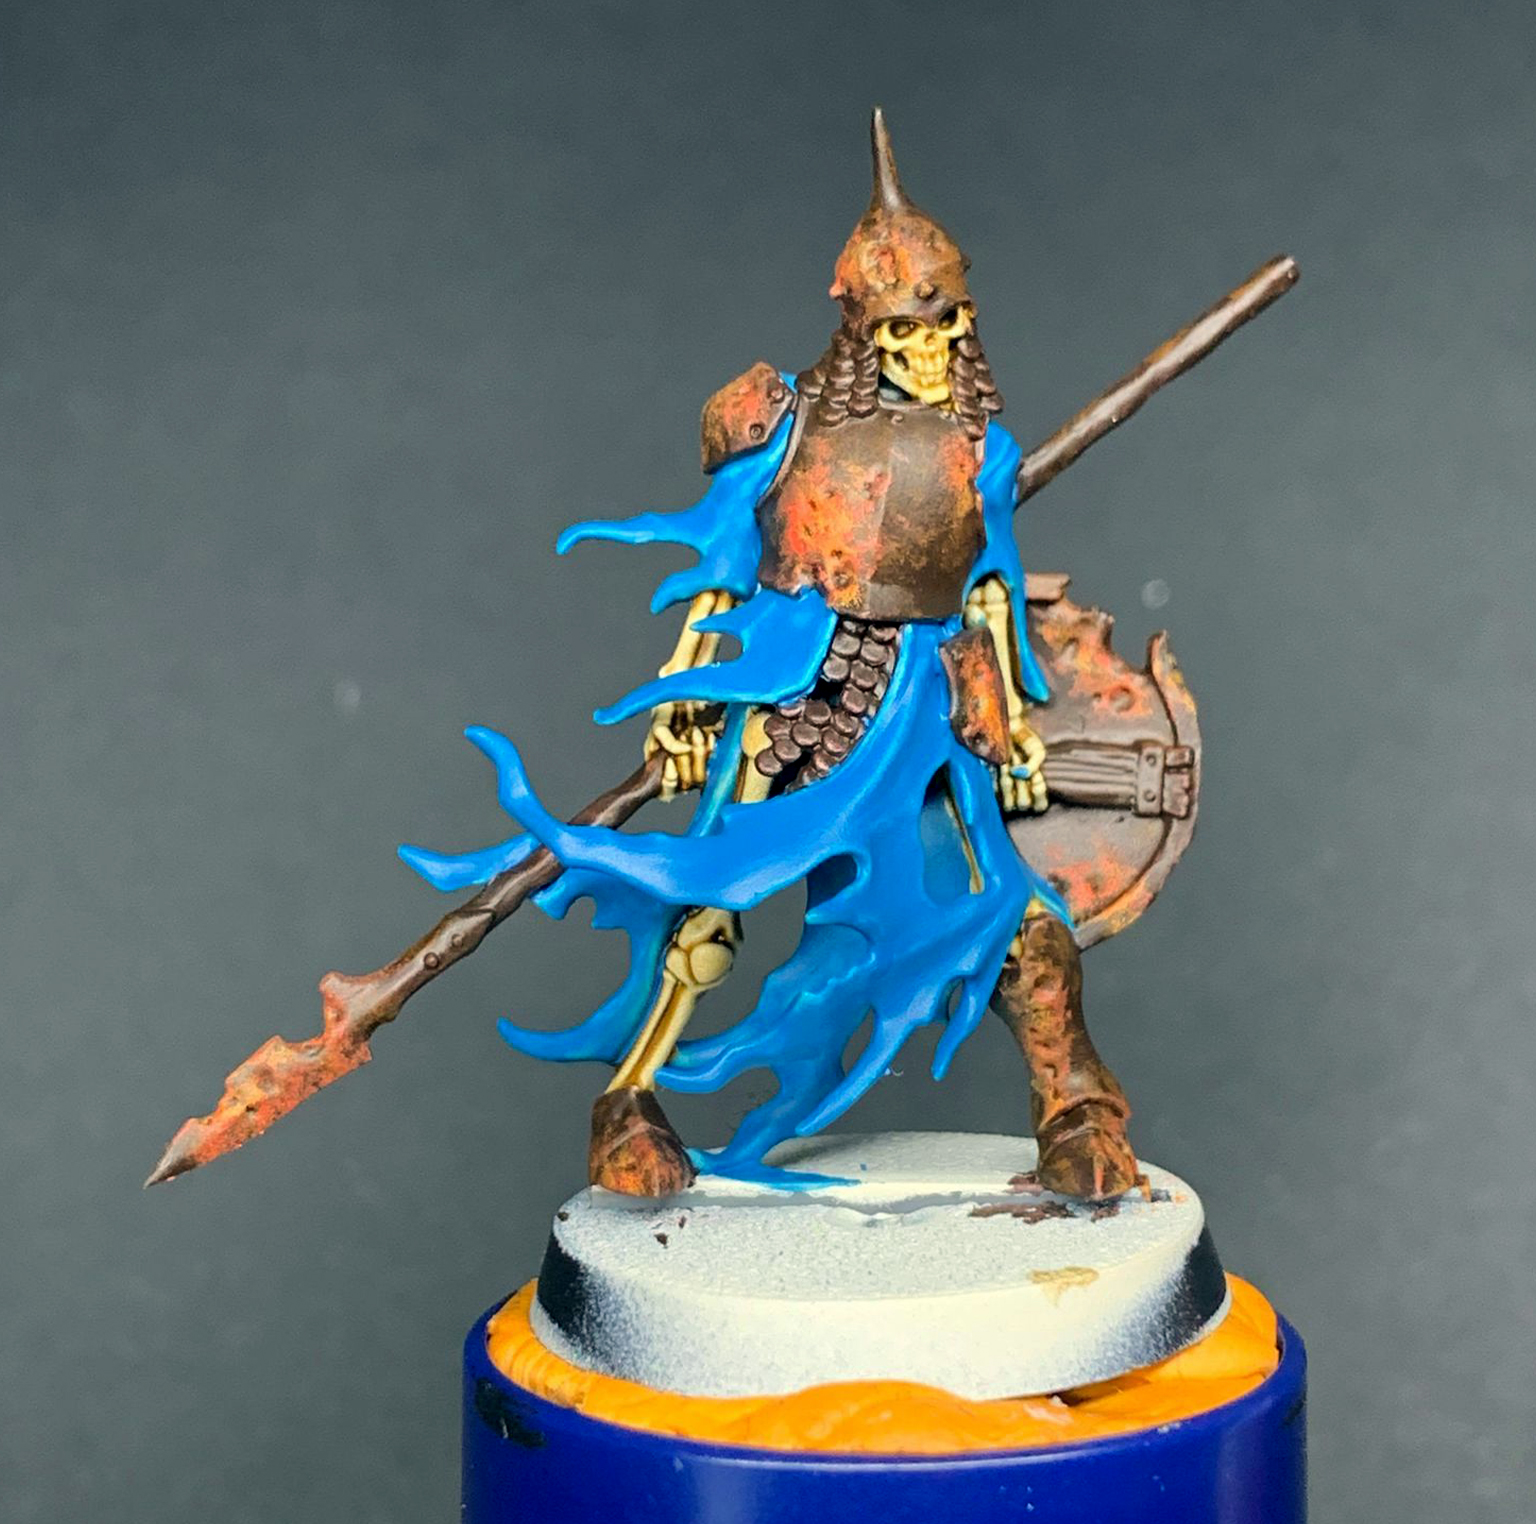
Once again were going to implement the stippling method using the Fire Dragon Bright even more focused on the areas we want to make rusty. By now you should see a nice collage of the colours we’ve used so far building up.
Step 5
By this point, you should be a dab hand with the stippling technique but for the moment, this will be the last time we use it, and it’s going to be with Zandri Dust. As you can see it’s very focussed on the orangey-rusty parts to just take the colouration to the highest level.
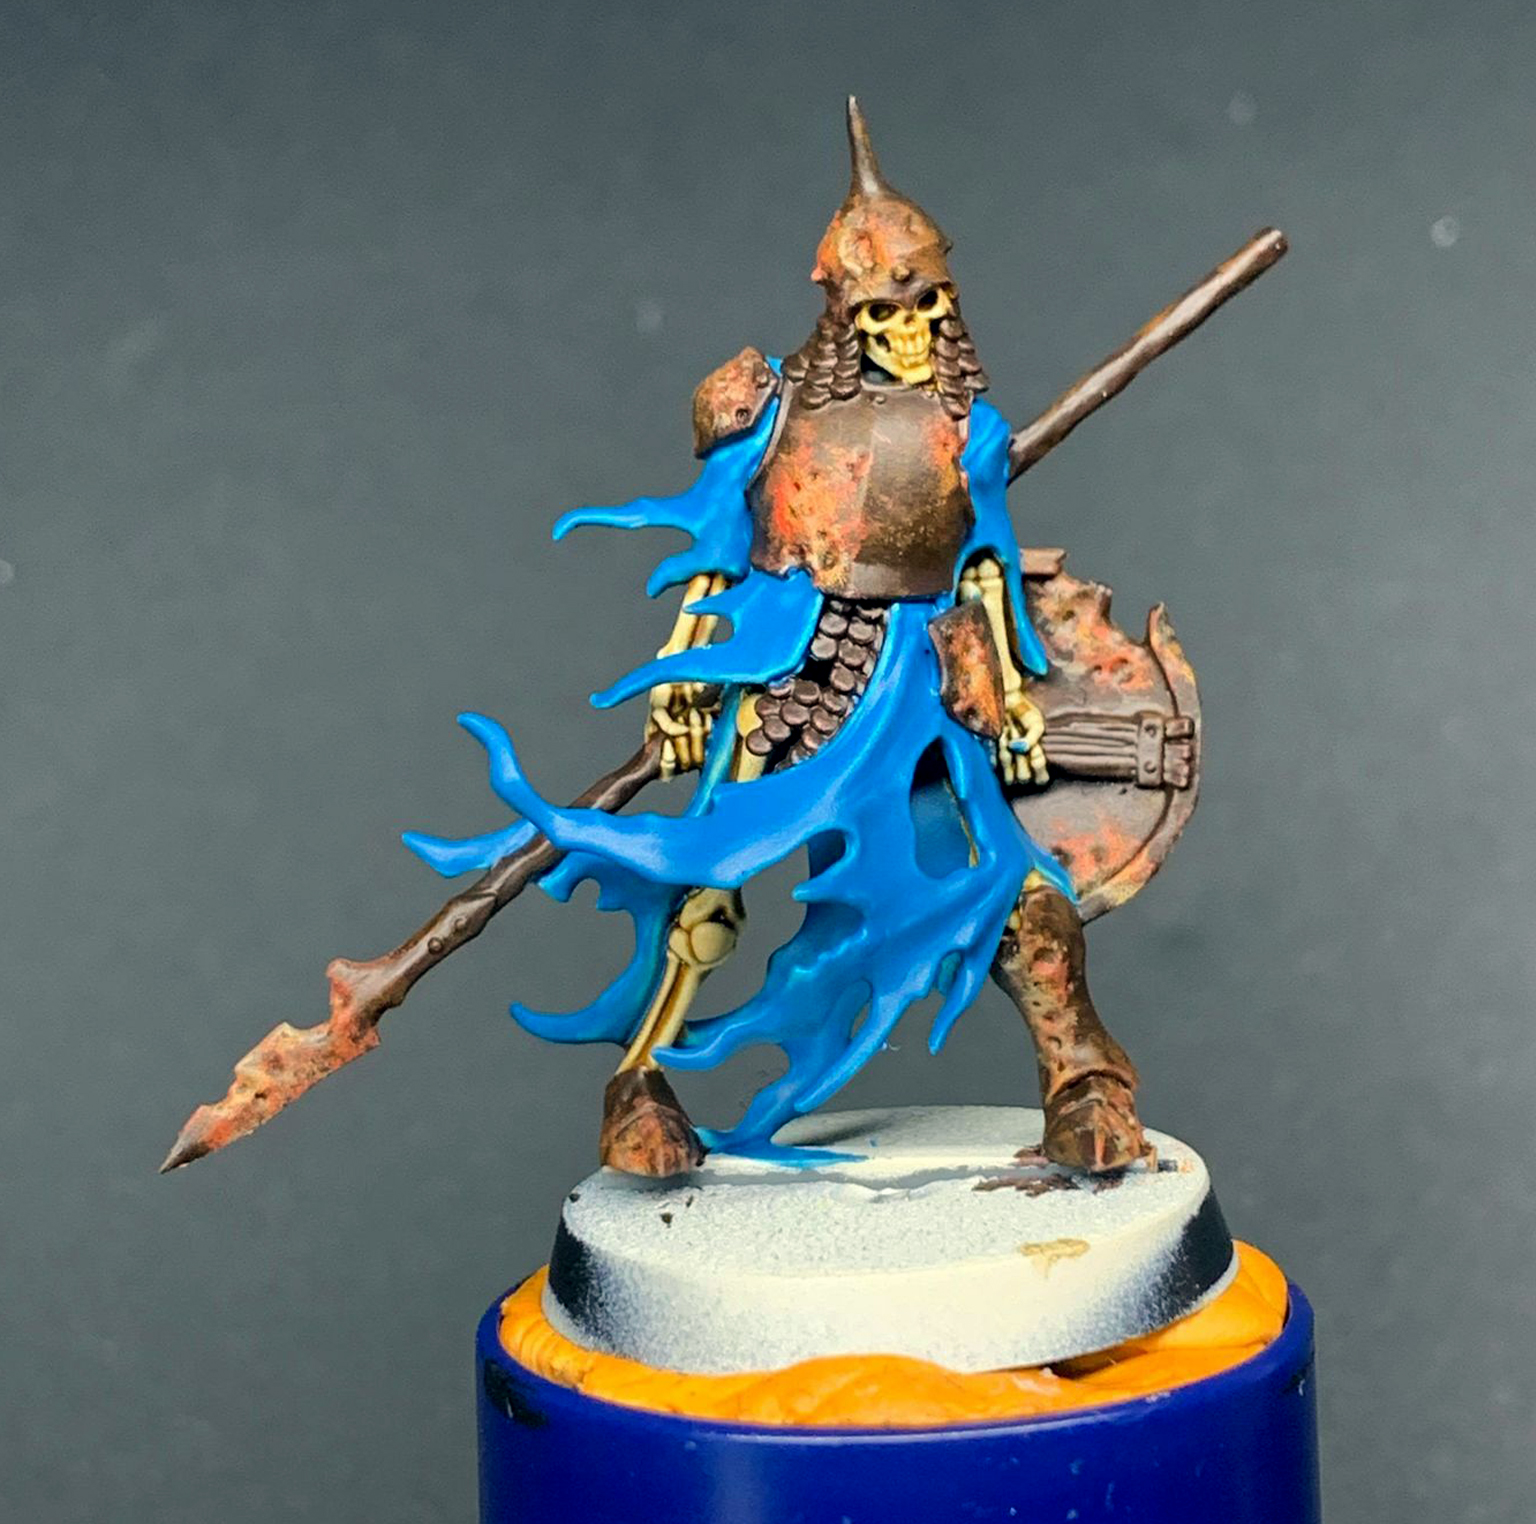
Step 6
By now you’re thinking: ‘This is super bright for rust… I want it to feel more dull and dingy.’ Well look no further than yours and my best friend, Agrax Earthshade! You want to do this all over the rusted areas (in this case it was all over the model) and don’t let it pool too much, were putting this shade over so we can blend in all the colours together and also to age the rusted metal.
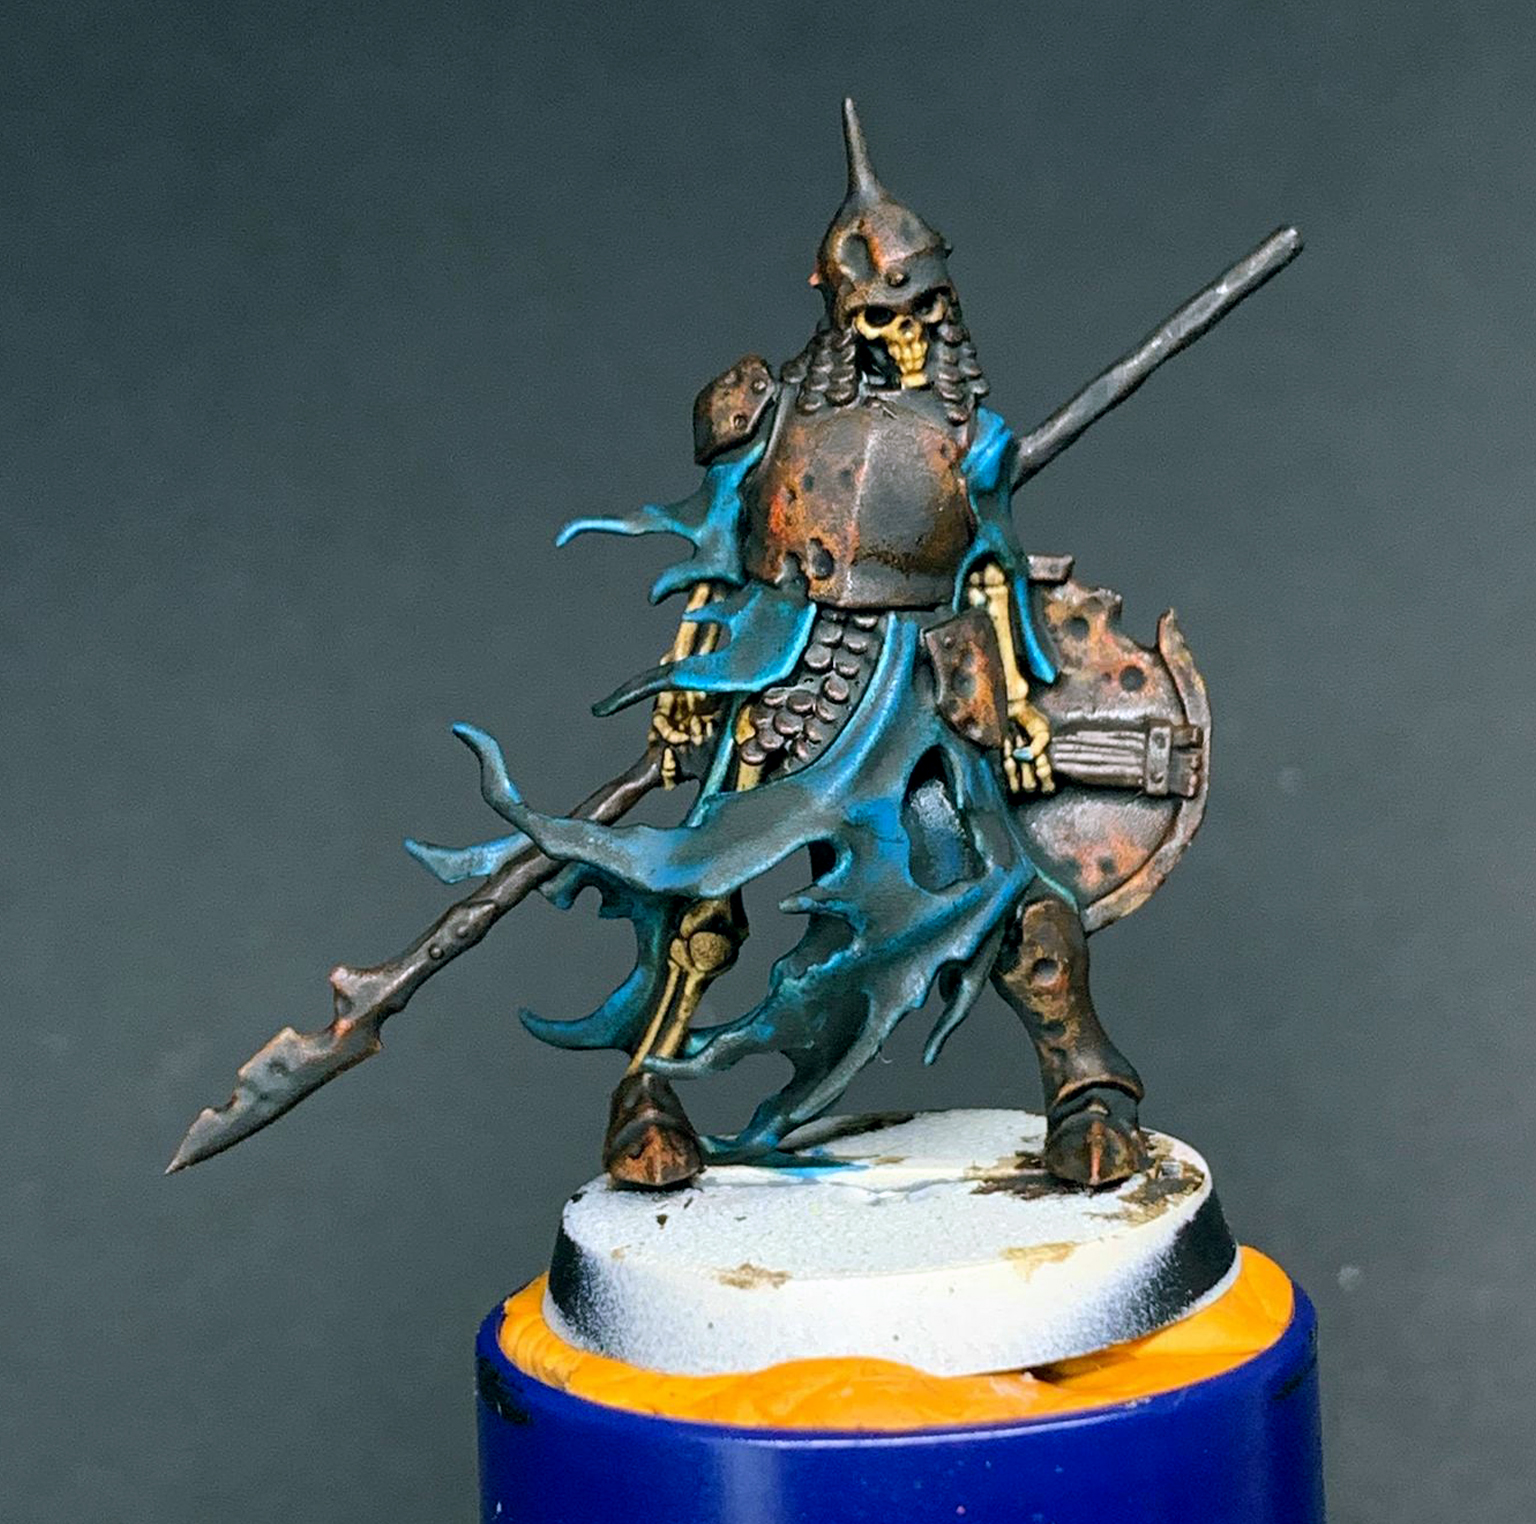
Step 7
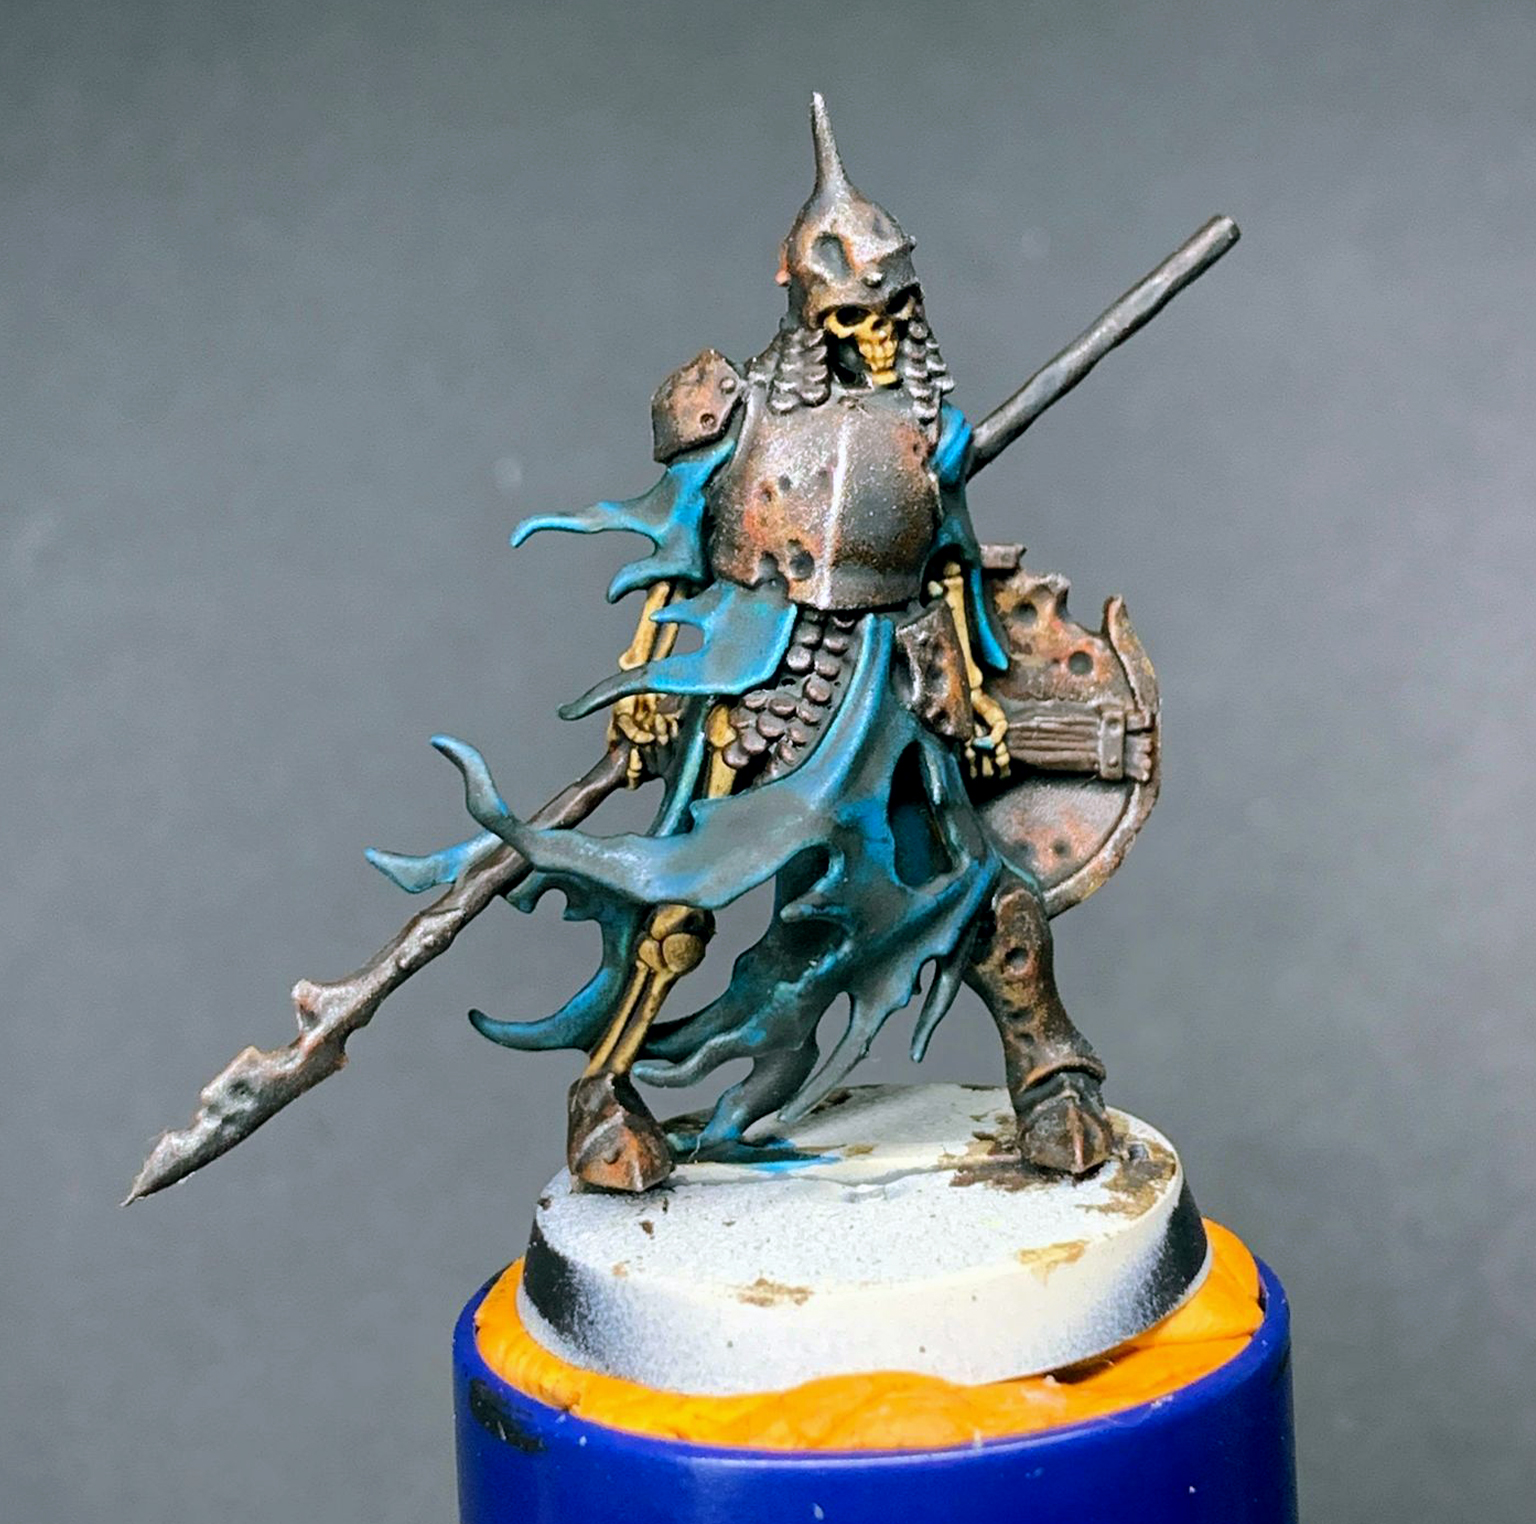
To finish off the look we now want to do a drybrush of Ironbreaker over the miniature, start of lighter as you can always easily add more paint to the model but struggle to take it away. Build it up over the highest areas to really emphasise the metal becoming degraded, then rusted and the use has chipped away the rust exposing the raw metal beneath.
And with that you are now a pro at doing really easy rusted armour! Ben’s informed me that he’s going to be using it on some space marines in the future for their whole colour scheme so I’m sure we will see how they look when it comes to it. For now a massive thank you to Realm of Plastic for doing a fantastic tutorial and we will see you next time.