

Today we have a basing guide from @MerlynModels, one of our wonderful community members!
A Blackstone Fortress is one of the largest, most powerful and mysterious spacecraft that the Gothic sector has ever encountered, even if Abbadon did prefer to use his like a battering ram against Cadia. (You are with the Emperor now, and yet? Cadia Stands!)
In the Warhammer Quest game, one of the titular Blackstone Fortresses lays motionless in space and a ramshackle welded together collection of ships nearby (called Precipice) contains our would-be heroes, mercenaries, xenos and those with objectives yet unknown.
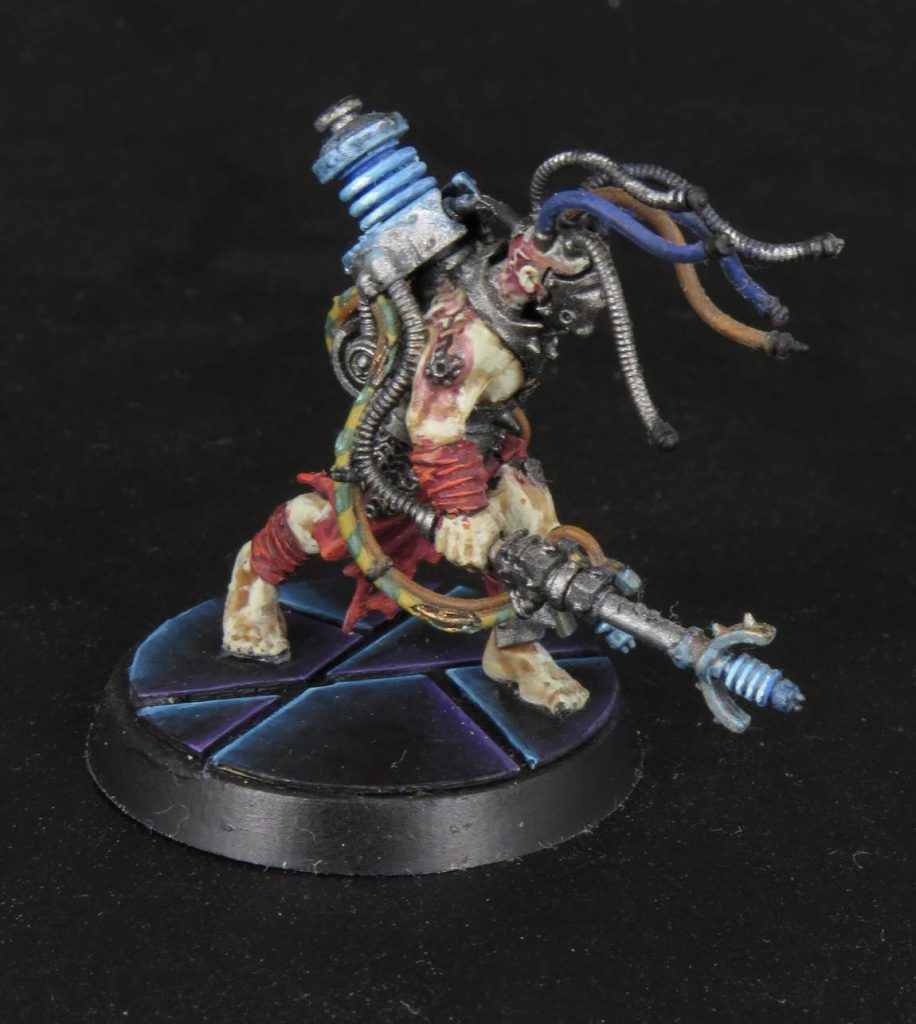
It’s not just the ships functions that are mysterious but also it’s form, with “ever-changing corridors”, the floor tiles in the game reflect this with isometric shapes on the floor, walls and objects; the adventurers’ models in the game are scaled up larger than their environs so with this tutorial the triangles and other shapes are bigger than the game’s floor tiles equivalent shapes so that they make sense against the models.
Firstly, what do we need?
• Self-healing cutting mat
• Compass cutter
• Craft knife
• A pen or pencil
• Metal ruler
• Card that’s smooth one wide side and rough on the other (like with a cracker box or other product)
• A plastic base
• Super glue
• (Optional) Hobby file
– Paints (These are just my choices, you could use other colours.)
◦ Liquitex (or other brand)
▪ Mars Black
◦ Citadel
▪ Xereus Purple (Layer)
▪ Genestealer Purple (Layer)
▪ Thousand Sons Blue (Base)
▪ Temple Guard Blue (Layer)
▪ Baharroth Blue (Edge)
◦ Black spray paint acrylic, I used “Chaos Black”.
Building the Base
Step One
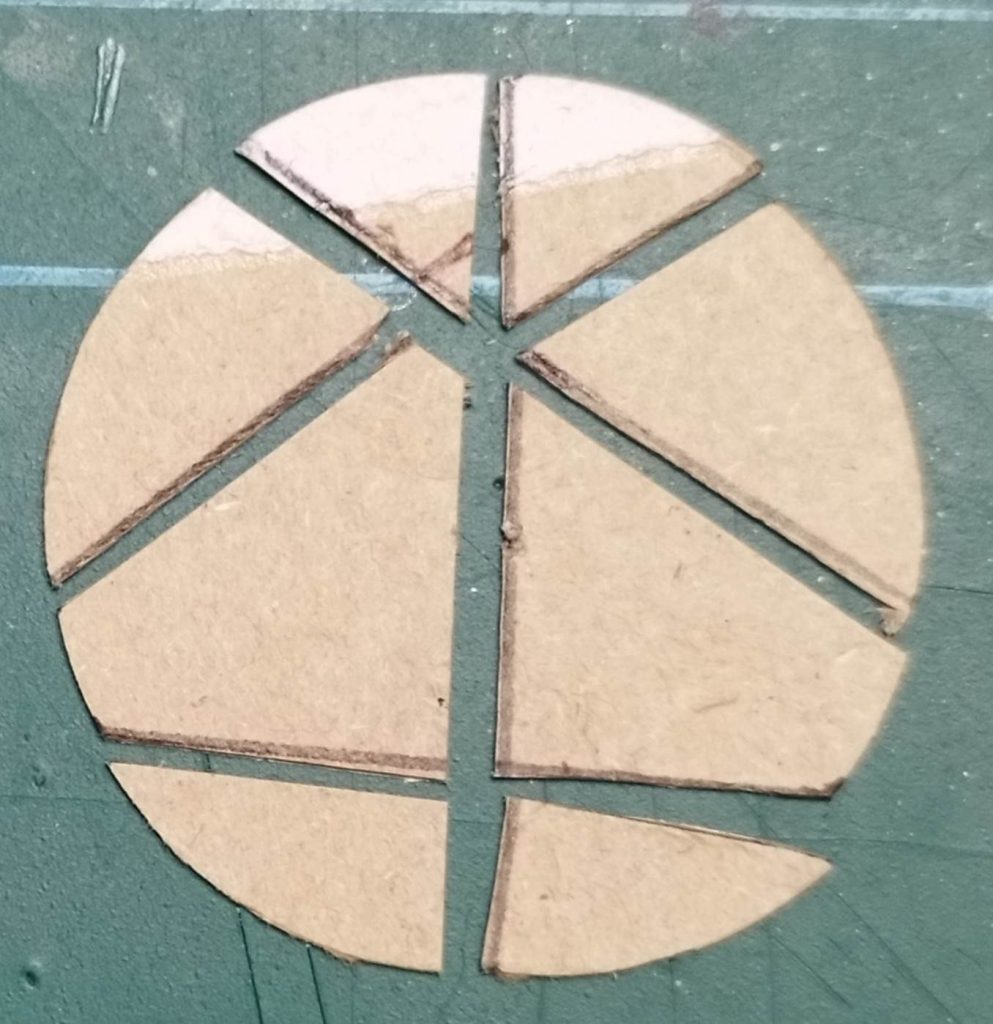
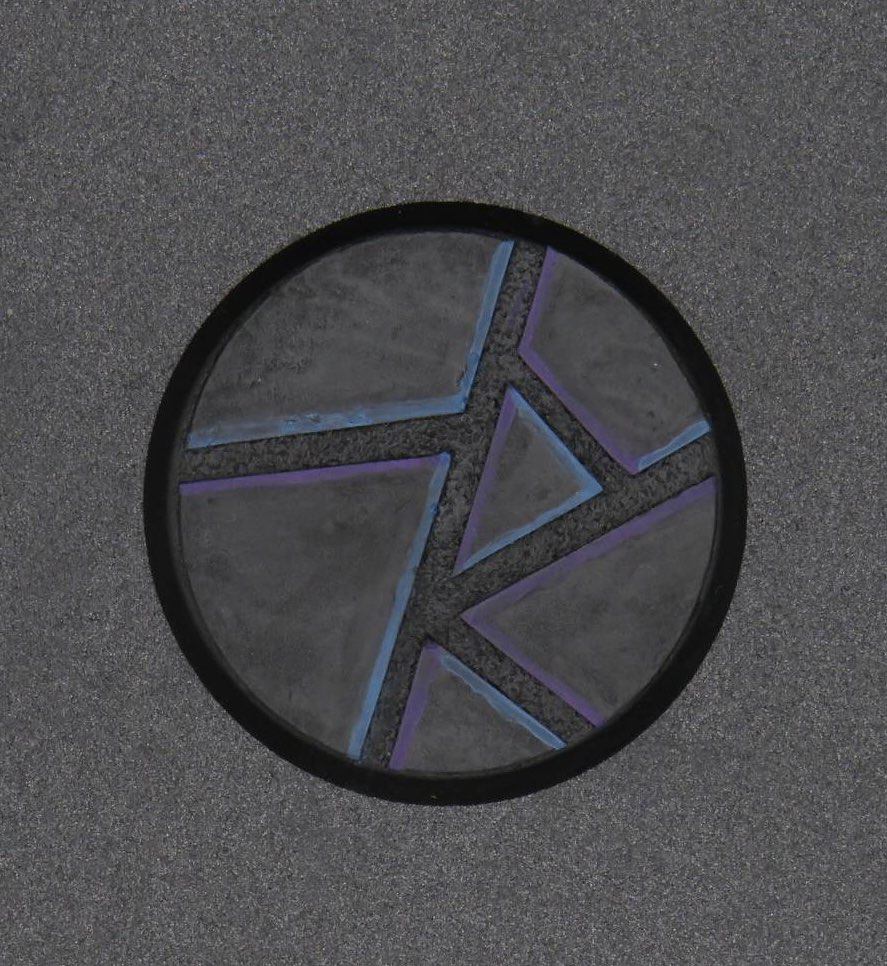
Take the compass cutter, cutting mat, pen (or pencil), craft knife, metal rule, and card. Citadel bases are chamfered, a 32mm base is 28mm top, remember to measure your bases’ diameter so you know what size to calibrate your compass cutter’s θ to (for mine it was in cms). Put the card smooth face down on the cutting mat and cut a circle using the compass cutter. Once you’ve done this, take the metal rule and a pen (pencil) and start drafting lines on the rough side of the card to make an isometric pattern you like and then use the metal rule and craft knife to cut these shapes out.
Step Two
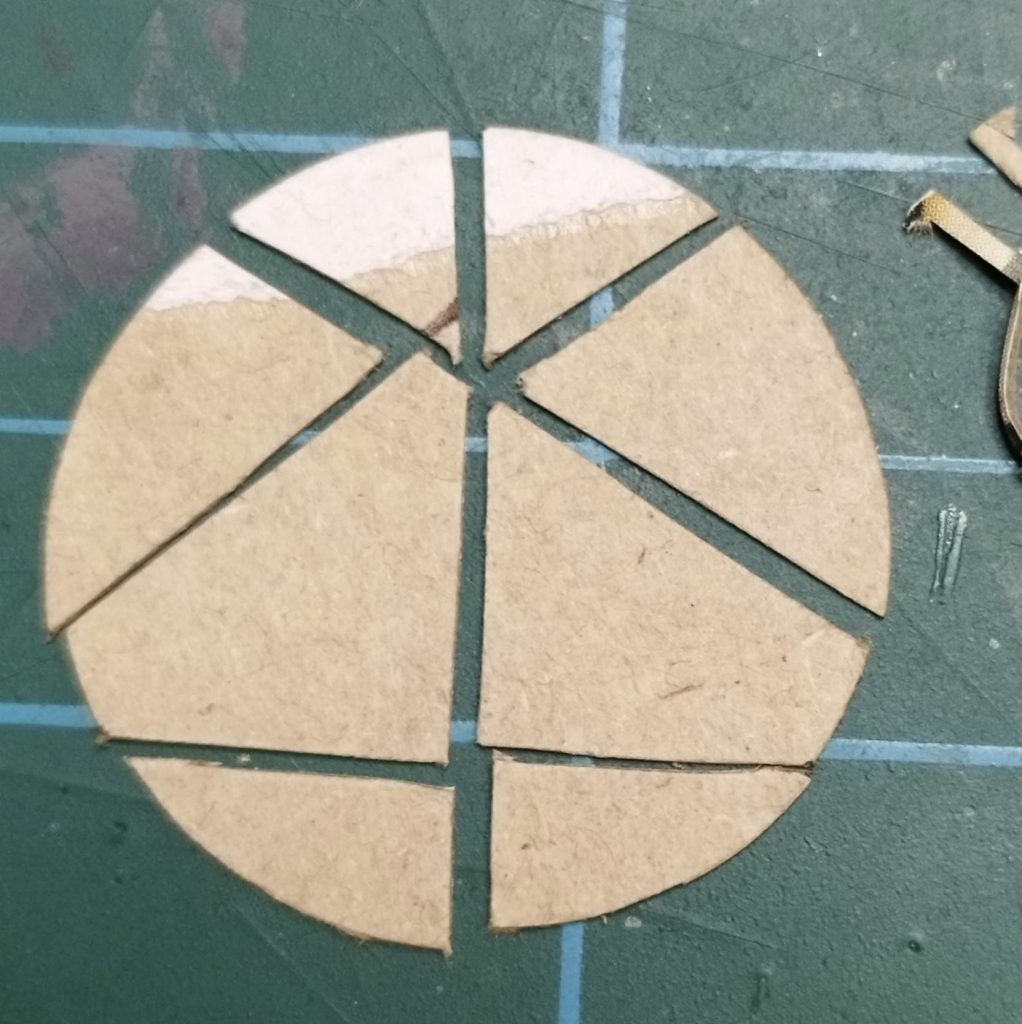
You’ll have noticed that the image for Step One doesn’t have a nasty hole in the middle caused by the compass cutter, this is avoided by this next step, use the metal rule and the craft on the straight edges and remove an additional 0.5mm, what this’ll do is give you a nice gap between the pieces.
Step Three
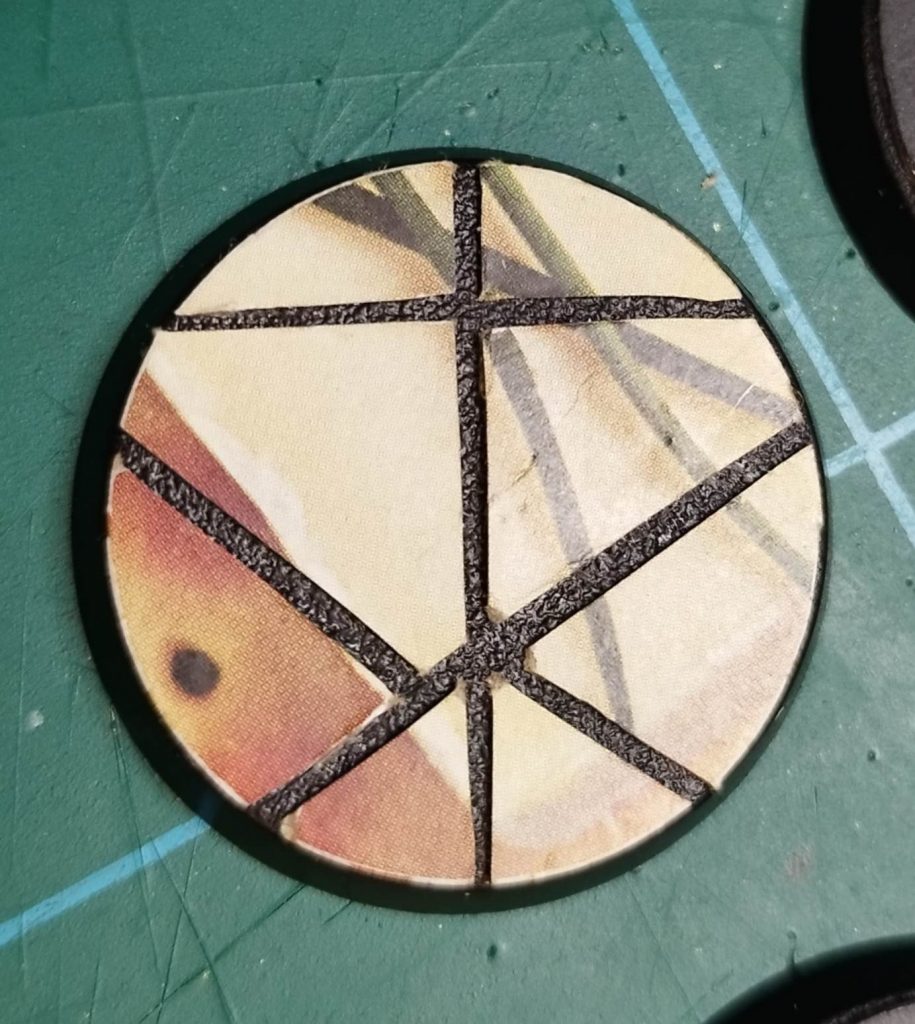
Now take the super glue and sparingly put it on the rough side of each piece as you glue them to the base smooth side up, try to get the pieces to match the curve of the base and be careful not to place them to close together to each other. If you got the card from a cracker box like I did then the patterns on the packaging will help with knowing that you’ve put the pieces in the right places. Once this step is complete spray prime it black.
Painting the Base
Step One
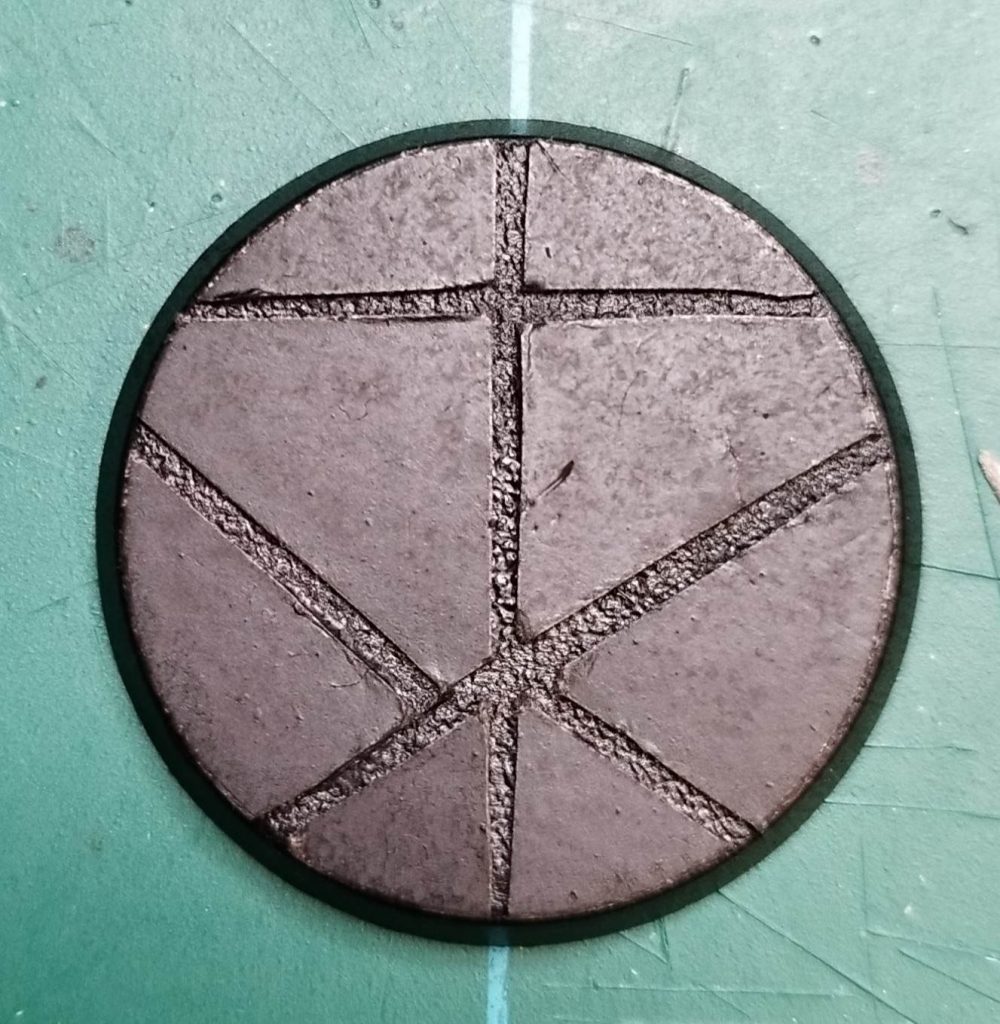
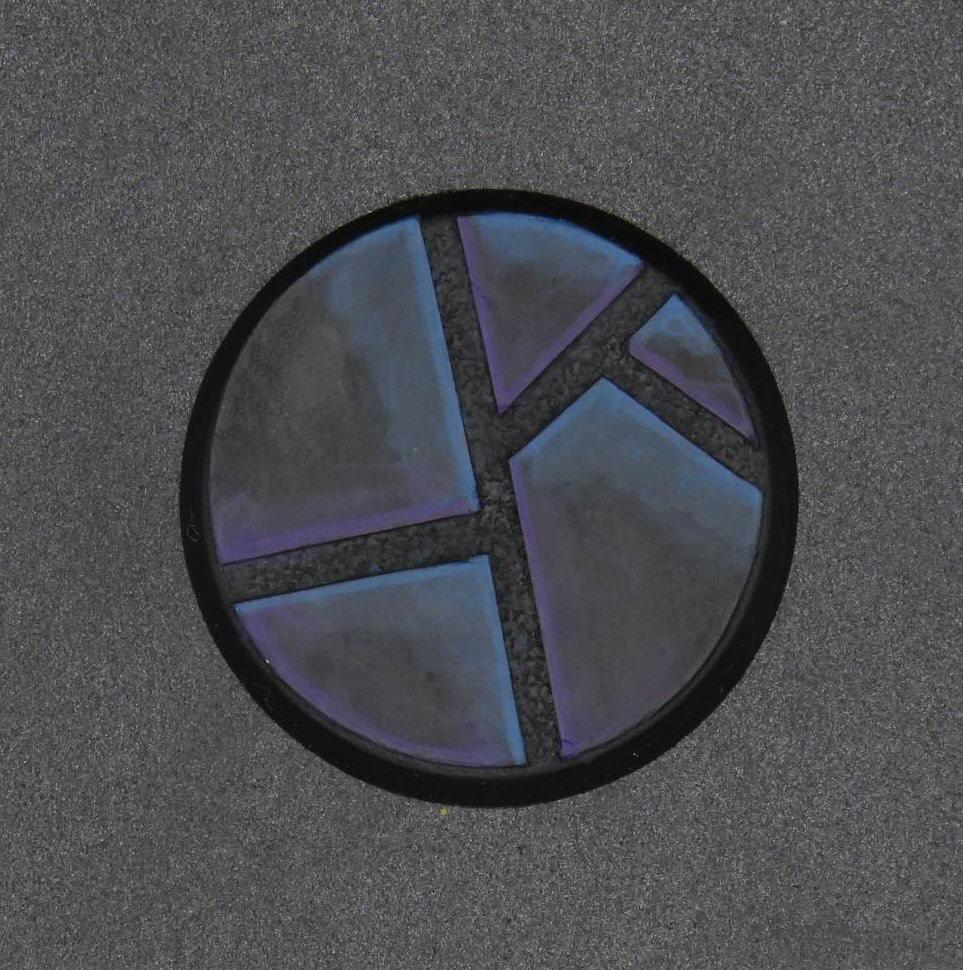
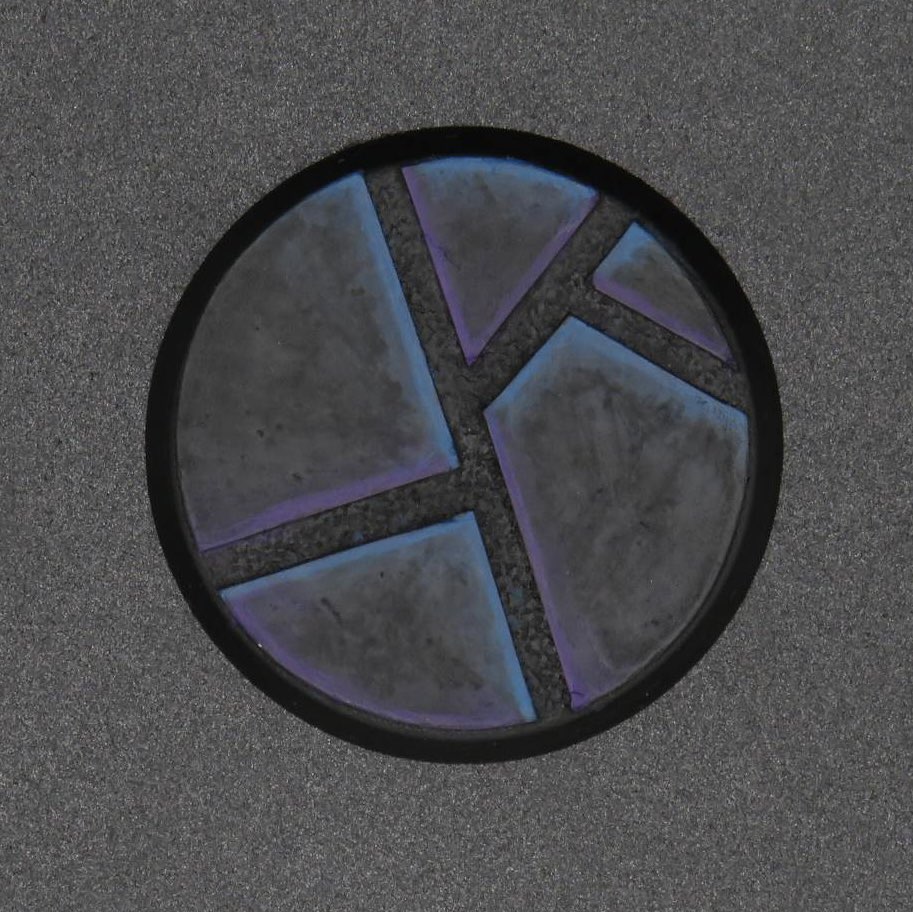
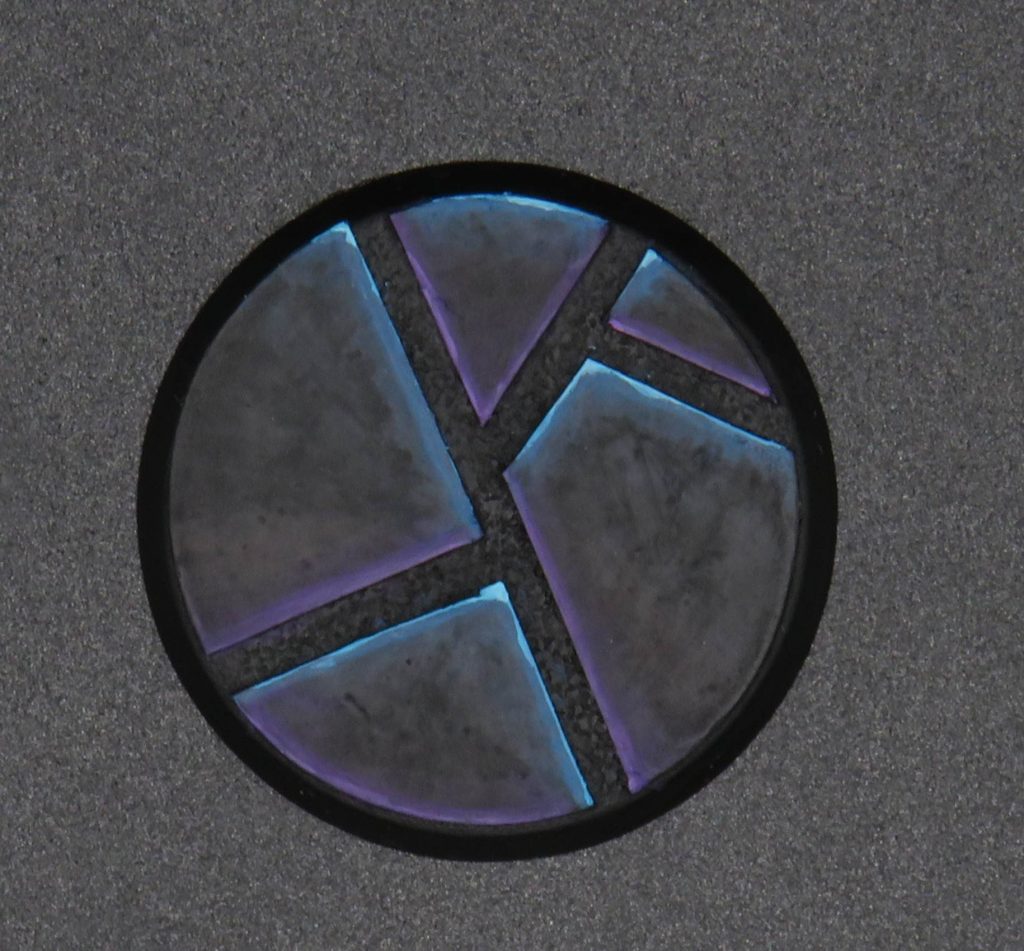
Take Thousands Sons Blue and Xereus Purple and base coat the edges that face in opposite directions to suggest low and high lighting.
Step Two
Using Xereus Purple and Thousand Sons Blue, glaze thinly towards the edges with a watered down version of the colours. (don’t be worried about how messy this is)
Step Three
Take Mars Black and glaze in the opposite direction that you used in Step Two either towards the centre or towards the edges that don’t have a colour, this both tidies the previous step and improves the transition.
Step Four
Take Temple Guard blue and Genestealer Purple and do a thin edge highlight on areas you think would catch the light. Then take Baharroth Blue and spot highlight the corners of the blue.
Final Step!
Minimally use super glue to glue the model to the base, if the glue flares and leaves a white mark on the base then wait for it to full dry and then glaze the immediate area black again.
Here’s one of my Negavolt Cultists!
If you have a go at making your own, be sure to post your pictures on social media using #TheHobbyRoomBlog and tag me at @merlynmodels on instagram or twitter.
Excited to see your adventurers setting off from Precipice to conquer the Blackstone Fortress!
Thanks MerlynModels! What a great tutorial and addition to our Hobby How To series! If anyone else has a tutorial they’d like to share, email me at ceri.thehobbyroom@gmail.com to let me know!