“Area Terrain” in miniature wargaming refers to sections of the battlefield that have an effect on the way the game is played, or the way your miniatures move through it. Two of the most common effects of this kind of terrain are blocking line of sight (preventing models from seeing others) and making difficult/dangerous terrain (which can either slow models down, or make an area impassable).
There are a wide array of different stand-alone buildings/ruins, as well as individual trees, available to purchase to perform this function, and both you and your opponent can agree the outlines of these features and work out line of sight on a case-by-case basis; but sometimes it’s nice to have a designated area on the table so that if a model’s base is touching the area, any relevant effects take place.
In this article I’ll show you how I went about making woodland areas. As with a previous Hobby How-to, Trees and Hedges (which I’ll refer to in a little while!), I didn’t know I’d be sharing these with you guys so I didn’t think to take nice photos of every little step! Hopefully you can follow along ok, though.
Making Woodland Bases
You will need:
- Sheets of 2-3mm foamboard (enough to cover 2x the surface area of your woodland bases)
- PVA glue (white glue, school glue, Elmer’s glue)
- Ready-mixed filler (spackle)
- Hobby knife (and, depending on your skill level with this, a first aid kit)
- Paints of your choice
- (optional) sand and rocks for added texture, and a circle-cutting tool
Trees/woodlands make any battlefield come to life, and often the space covered by the woods will have an effect on gameplay. We’re going to create a specific area that models can be placed on so they can be deemed “in the woods”.
Creating the area outline
On a sheet of your foamboard, draw an outline of the area your woodland should take up. Think about making it a nice organic shape, how many trees you’d like to have in the area, and how much space you need between each tree (both to look nice, and to allow your trees to fit side-by-side).
Once you’ve drawn your outline, carefully cut it out using your hobby knife, then use it as a template to draw another identical outline onto your foamboard sheet, cutting that one out too. You’ve now got a roughly 4-6mm deep pair of identically-shaped pieces of foamboard.
Spacing trees and sloping edges
Set aside one half of each pair of shapes you have. The half you set aside will be the “base”. In the top half, cut out circles that are 3 inches in diameter and keep these for later. Try to be as neat as you can with this, as these 3” circles will become the bases for your trees themselves (as seen in Hobby How-to: Trees and Hedges). These trees can be placed on the battlefield separately using their own bases, or can be individually removed from the woodland area in order to easily move models around while they’re still clearly “in the woods”.

If you’re careful and patient you can use your hobby knife for this, but you can also get a special circle-cutting tool fairly cheaply that looks a bit like the one you can see here.
The benefit of using one of these is getting a nice uniform cut. As a tip, though: do NOT try to get it all done with one cut. Whether you use your hobby knife or a special tool, several shallow cuts will always do a much nicer job and is much safer.
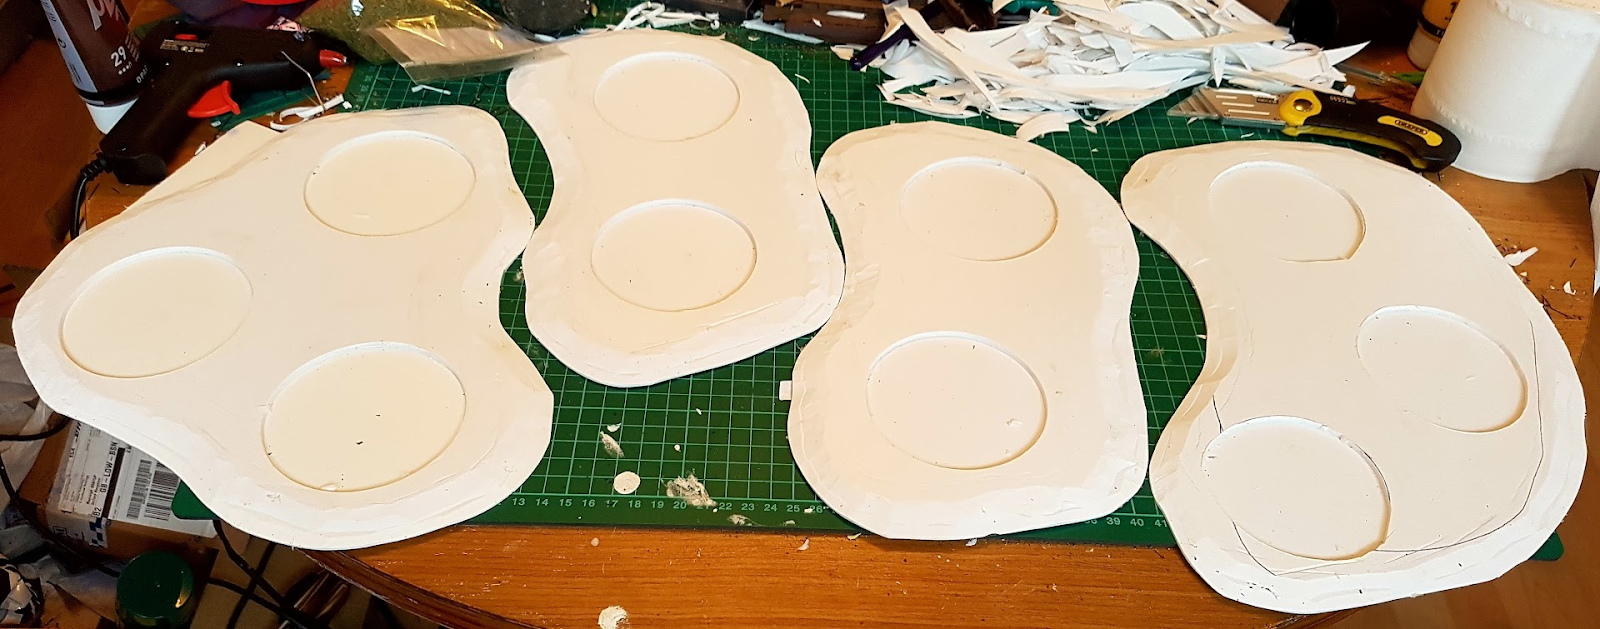
When you’ve got your foamboard shapes with 3” circles cut out, these can be reunited with the lower halves.
Two things need to happen now: the edges need to be bevelled (cut at a slope to blend into the battlefield and look nice), and the two foamboard sheets need to be stuck together.
Being mostly polystyrene, the foamboard is very easy to cut at an angle along the edge to create this slope (being very careful to keep control over the knife, cut away from yourself, and making sure that no body parts, pets or people are beyond where you’re cutting!)
You’ll get the best result by cutting the slope when both sheets are combined. You can either glue them first and cut second, or pin them in place to stop the two halves sliding. In my case, I glued the two halves and allowed it to fully dry before cutting.
Gluing tip: PVA is the glue of choice here as it’ll form a strong bond between the two halves, and when dry it’ll harden and give more stability to the base. Normally you’d need to worry about warping with PVA, but the presence of the 3” holes will allow more air to contact and cure the glue at once, meaning it’ll dry more evenly.
Put dots of glue on the underside of the top half (with the holes cut in), then spread the glue thinly and evenly across the foamboard. Once that’s done, combine the two halves, making sure their edges are lined up. Leave this to fully dry. Maybe come back the next day!
Sealing and texturing
To protect the polystyrene, make your woodland areas easier to paint and just plain look cool, we need to seal the surface using ready mixed filler (spackle). You can also optionally add a little bit of PVA glue into the filler to give it extra rigidity when it dries.
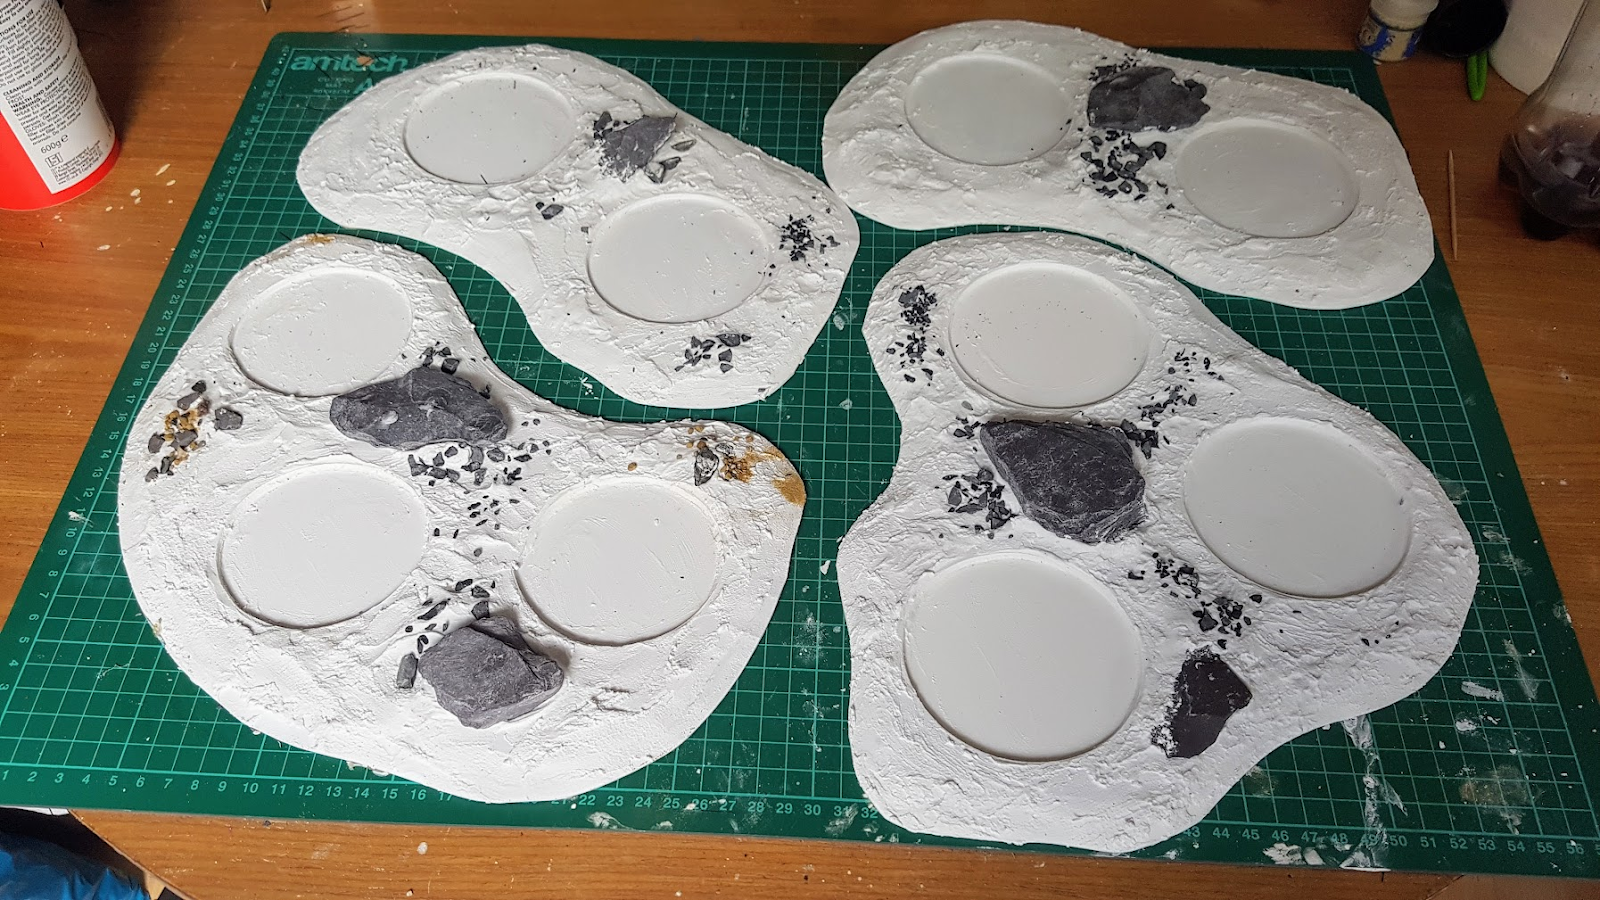
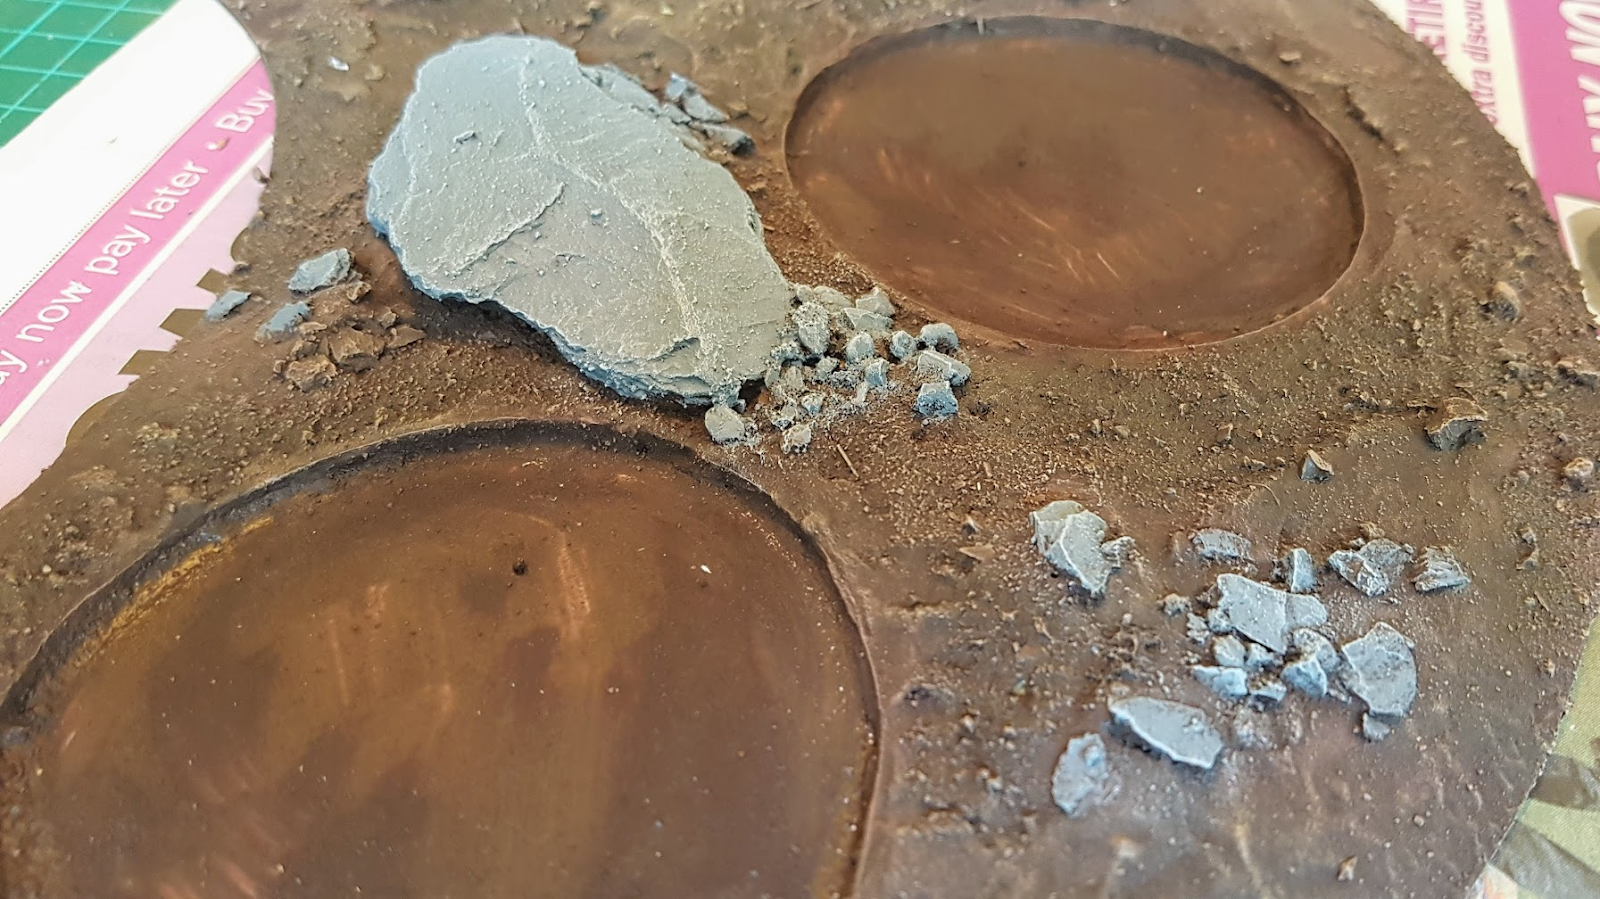
To get to the stage shown in the picture above, do the following:
- With slightly wet fingers (keep a cup of water nearby), apply the filler over the entirety of the top-side of the woodland base. You also want to get some into the holes where your 3” tree bases will go, but this must be very thin so the trees’ bases can still fit in the holes. Use a tool or your finger to scrape round the inside edges of these holes.
The most important bits to cover with the filler are the sloped edges. This will not only help to hide where the two sheets of foamboard meet, but will protect the polystyrene edge and allow you to paint it more easily.
Thicker areas of filler can be applied here and there, messing it up either with your finger or a tool (scrunched up tin foil, a coarse dish sponge, etc.) to make the texture a little more varied - While the filler is still wet, add any sand or stones you want. This is completely optional! If you’re putting bigger rocks on like I’ve done above, be sure to give a bigger blob of filler for it to sink into.
Let this fully dry (this can take several hours depending on temperature and humidity), and that’s the construction part done!
Painting and decorating
Nothing fancy needed here, it’s only going to be covered up by grass and trees anyway!
I used a cheap brush and brown craft paint from an art store to cover the entirety of the base, drybrushing with a couple of lighter browns. For the larger rocks, I picked these out with a light grey and drybrushed by mixing a bit of white into the grey.
—TOP SECRET— Basing Material
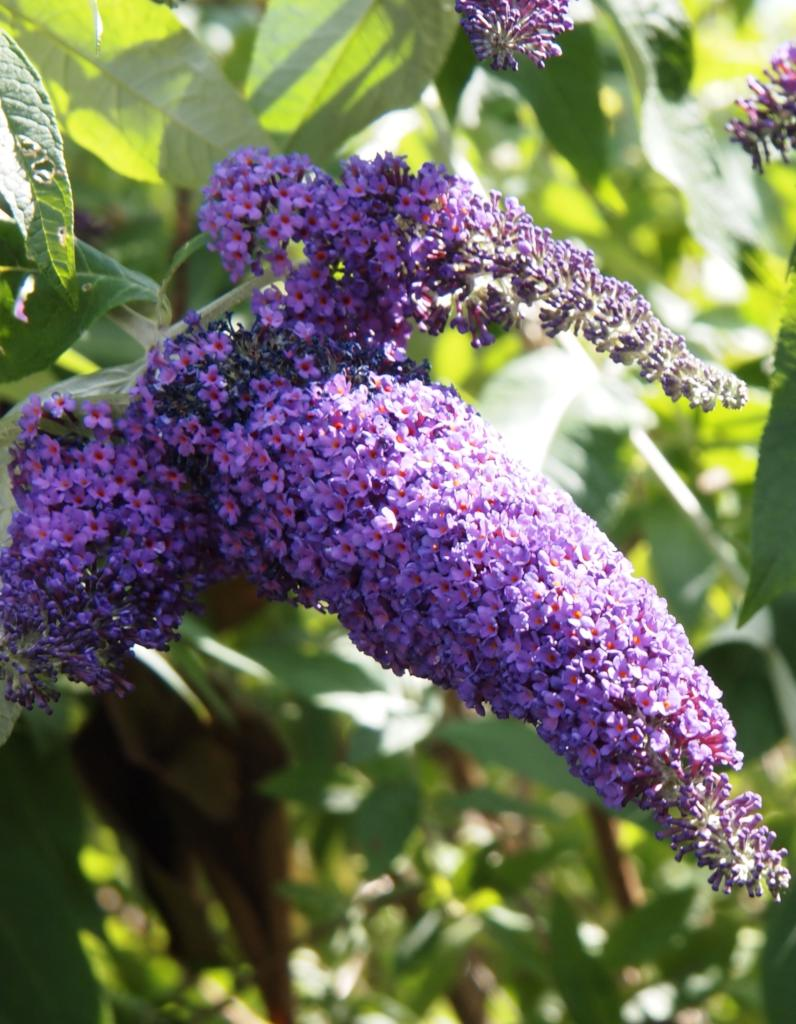
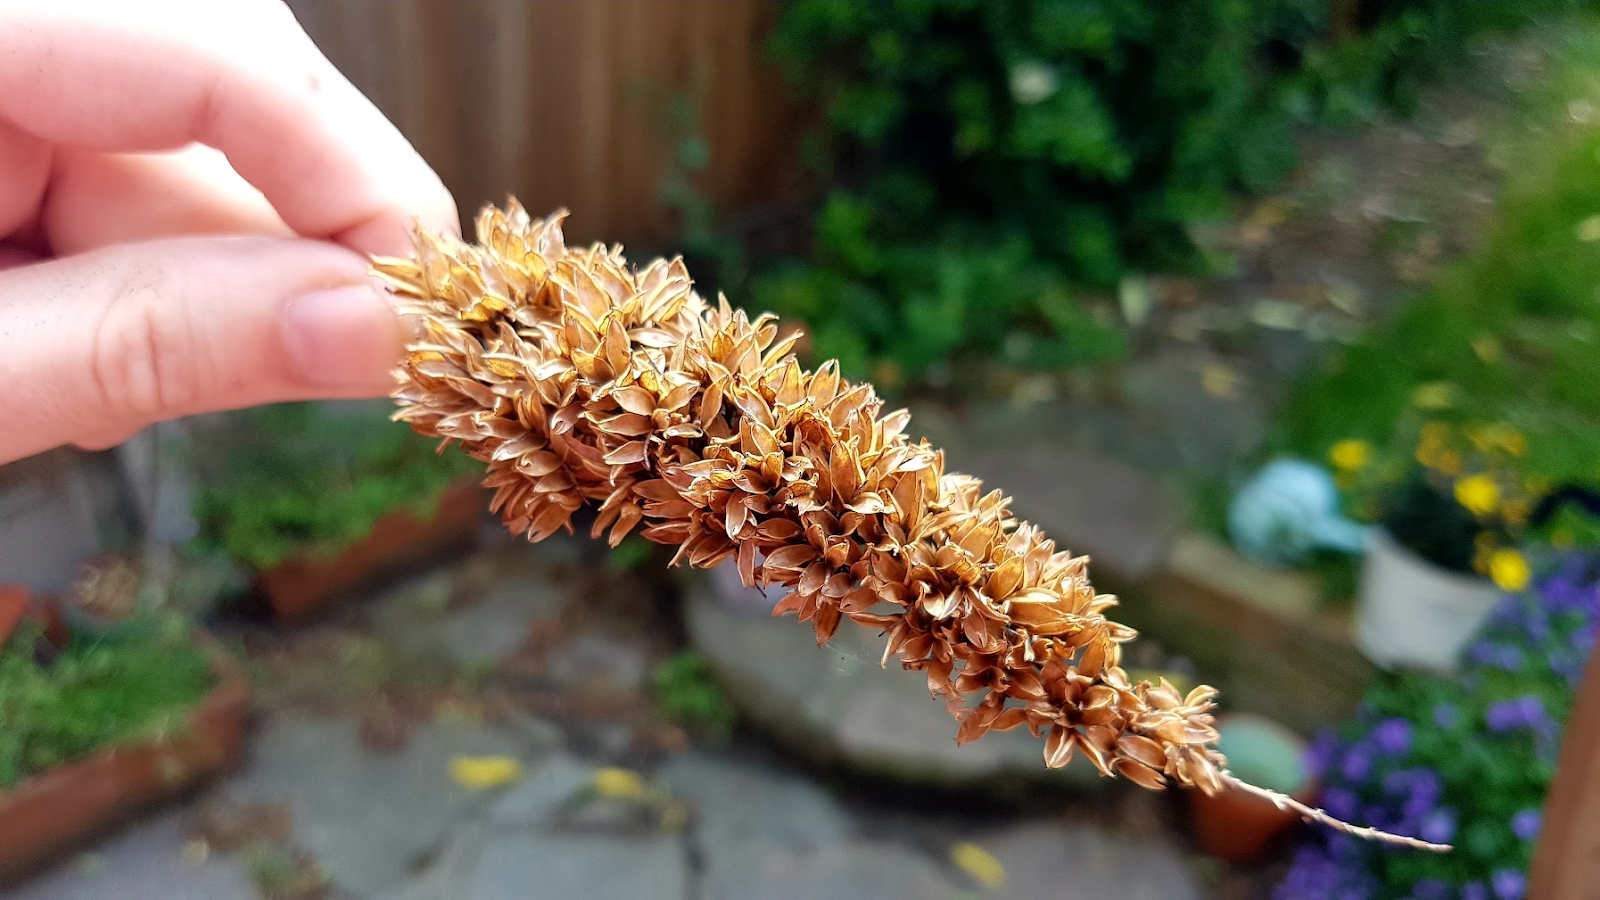
I’m about to let you in on a secret here, and you can’t tell anyone. I’m about to tell you about an under-utilized, and totally FREE basing material that’ll change your life forever, and it’s been my secret weapon for some time now: buddleia petals.
Buddleia is known by a few names, commonly “butterfly bush”, and they’re very easy to spot by their bright purple flowers. They bloom more than once a year, and when they’re finished their flowers turn into pre-made fallen leaf scatter material for basing. NOTE: as with any organic material from the outside world that you want to use for modelling, you need to wash it with some disinfectant (to kill all the micro-beasties) and then allow it to dry fully before using it.
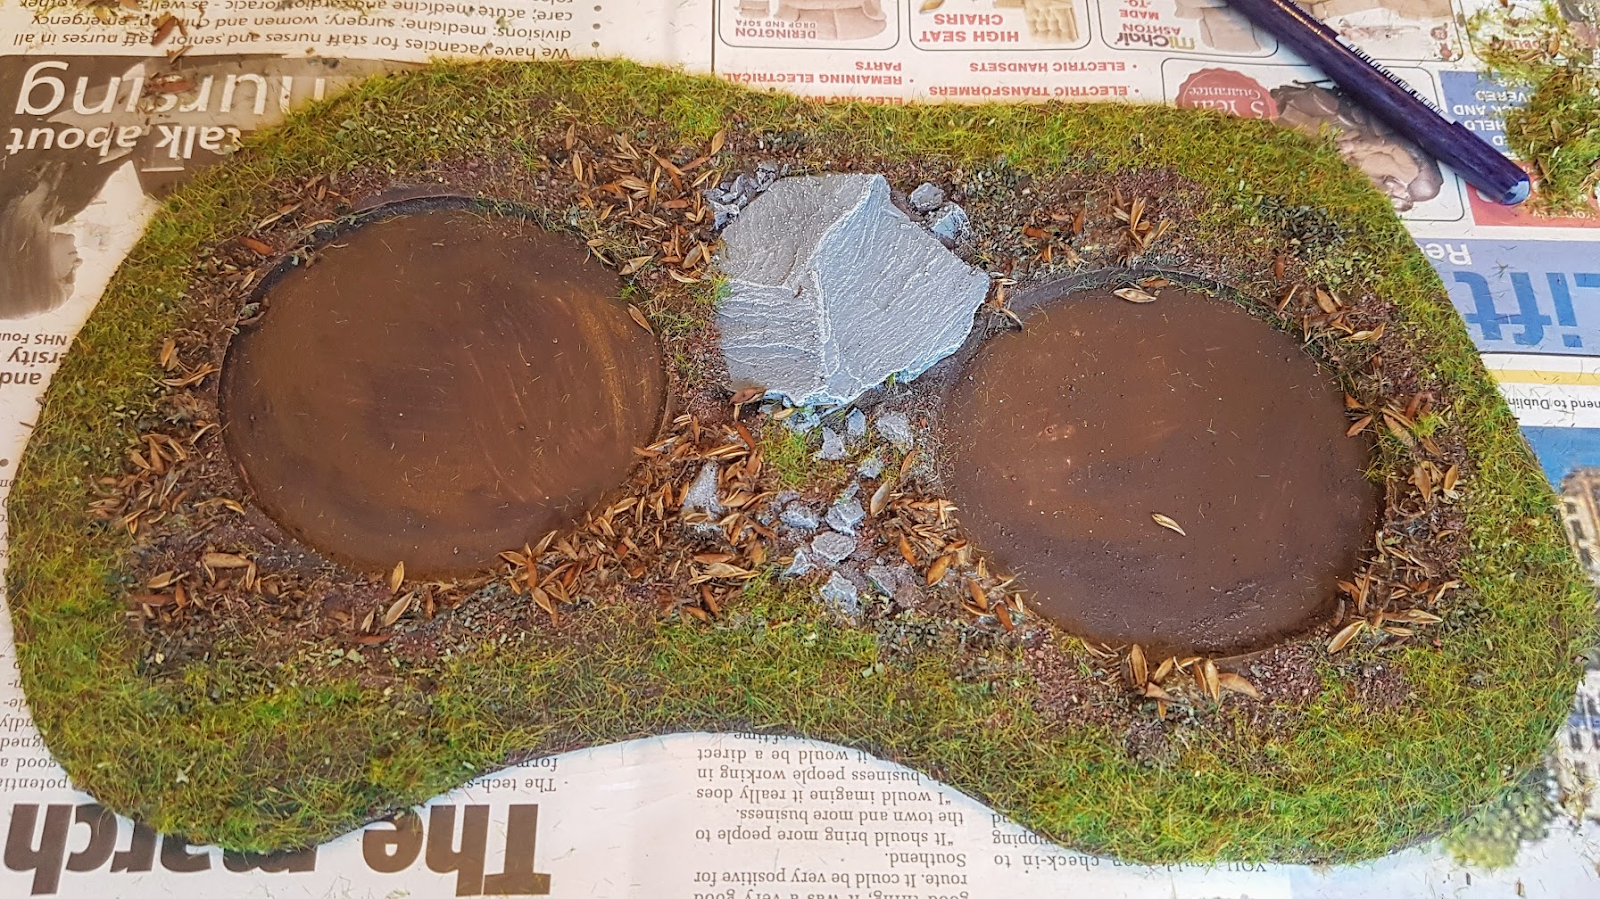
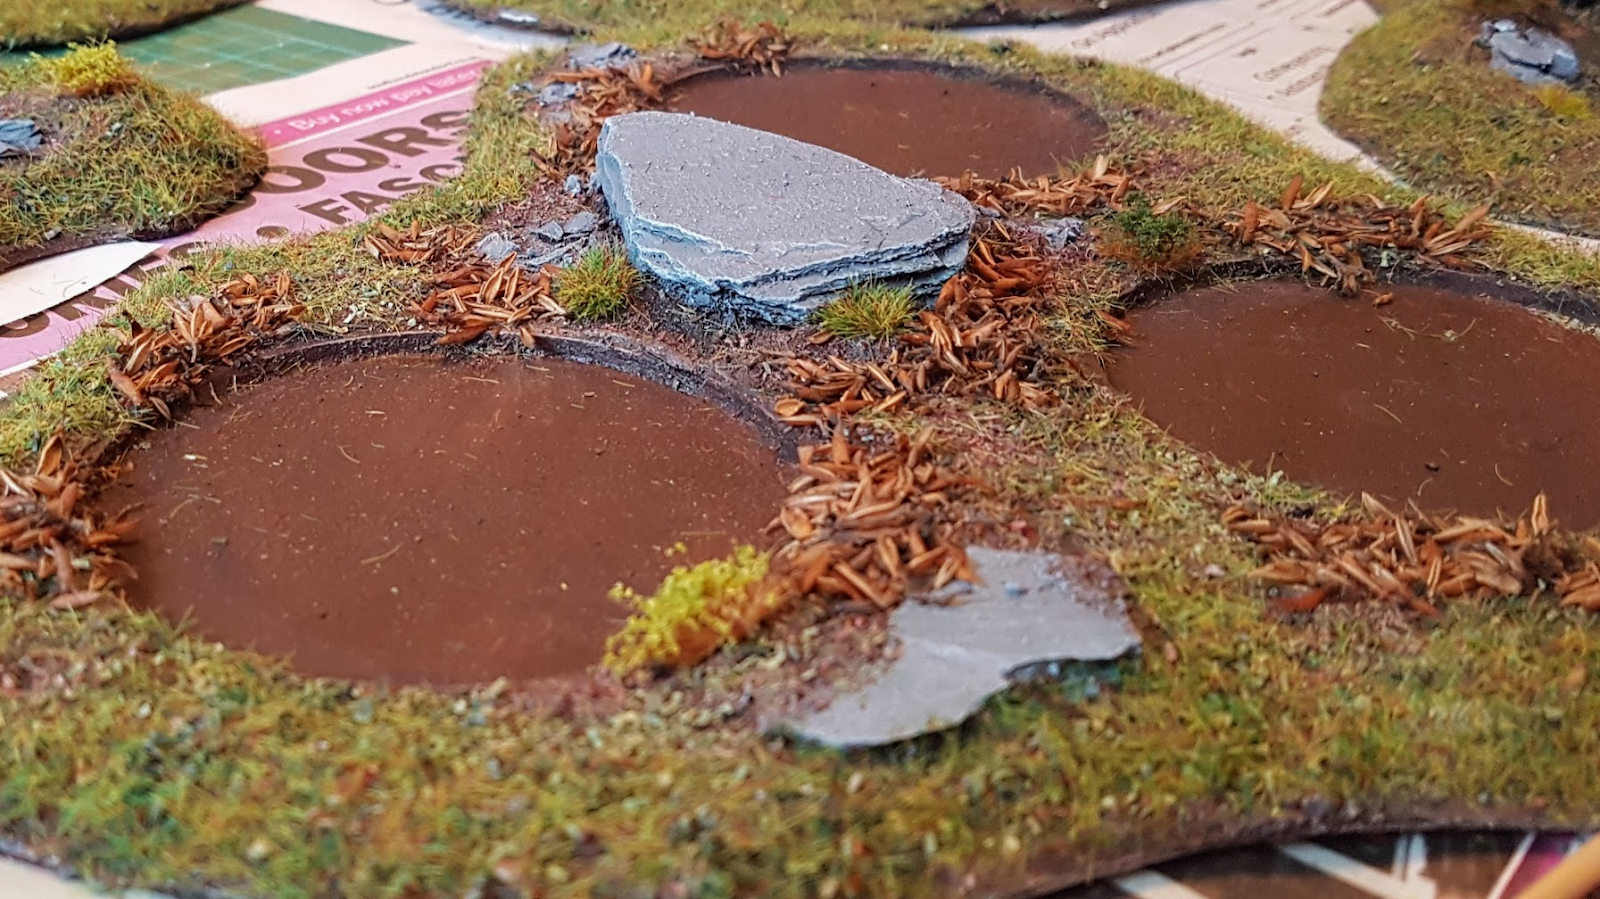
Here’s some of the bases that’ve had static grass, a couple of tactical tufts, and my secret weapon applied. The grass and petals are applied with PVA glue. The tufts are self-adhesive, but you can always put a little blob of glue down first.
This is just a suggestion of only one way of doing a woodland area! You could always apply your own decorations, use more or less trees, or even adapt the technique to complete different area terrain types such as urban ruins (replacing the tree bases with parts of buildings). If you have a go at making your own, be sure to post your pictures on the Hobby Room discord server, or on social media using #TheHobbyRoomBlog !
Thanks MrLlamatastic! This will come in real handy when making more terrain boards for the live events streaming we do! Check out more of the Hobby How To’s to see more scenery building guides from our infamous long necked sheep!