

Save Some Money, Make Your Own
There are plenty of different varieties of pre-made trees available to purchase from retailers, ranging from basic wargaming trees to highly detailed, lifelike replicas. They’re also available in a range of scales to suit every situation, whether it’s simply adding texture and blocking line of sight on a battlefield, or faithfully recreating a scene in a diorama.
Unless you’re only looking to get one or two trees, though, buying these can often turn out to be quite expensive. Making your own in bulk can be a very cost-saving exercise, and also allows you to customize the size and style to suit your needs.
In today’s post I thought I’d share with you how I made some trees, hedges and bushes way back in 2017. They’re designed for function over style, destined to go on wargaming tables rather than win any artistic awards! I didn’t know I was going to be sharing these with anyone, so the photos aren’t spectacular, but hopefully it’ll help out!
Starting With the Base-ics
The first thing you’ll need to do is decide what kind of base you’d like to use.

I have a 3D printer, so I printed out a selection of plastic bases I could work from. The ones shown here in my picture are these ones on Thingiverse. A key part of these for the project I had in mind was the hole at the top of the tree trunks, this is going to allow wires that support the treetops to be inserted into them and stand up.
If you don’t have access to a 3D printer, similar things can be made using twisted wire and putty (more on that later).
For the hedges and bushes, I created bases by drawing out shapes onto some foamboard and then carefully cutting out with a hobby knife. While I was cutting out these bases, I cut some 3” circles to stick the plastic tree bases to (spoilers for a later post!).


You should choose the style of base you use to match the purpose of your trees and hedges. For me, this was wargaming, so I wanted a nice flat base that would help prevent them being knocked around.
Making Life and Limbs
There are plenty of ways to form the body of the trees, and plenty more qualified than myself to tell you about them (a particular shout out to Mel the Terrain Tutor on YouTube), but I’ll tell you which methods I used and you can judge for yourselves whether it’s any good!
The first method is fairly simple, but be prepared to have your entire hobby space covered in little bits of plastic!

You can very cheaply purchase long lengths of twisted wire covered in strands of plastic that are designed to clear gutters and prevent trash getting into them. The naming of these varies but they’re commonly called either gutter brushes, gutter guards, or hedgehog brushes.
These can be cut into shorter sections using strong wire cutters, and then have their plastic bristles trimmed with scissors in order to form the shape of evergreen trees. You can decide how tall your tree is by altering the lengths you cut.
When cutting the lengths of wire, take into account an amount at the bottom that you’ll clear of all bristles. This will act as more of the trunk of your tree. If you’re playing a 25-28mm wargame, for example, you may want to leave a few inches clear in order to move troops around underneath them.

Now I’ll be the first to admit…. these don’t look pretty! The important things to note here are: 1) the length of wire I left bare at the bottom was coated in hot glue and inserted into the hole of the plastic tree bases, and 2) I coated the bare wire at the top end with a blob of hot glue. This helps to prevent the coiled wire from opening and causing more bristles to be lost.
The second method I used was a little more involved. I’ll say again, I didn’t know I was going to be sharing these photos with anyone, so you’ll have to excuse the mess!
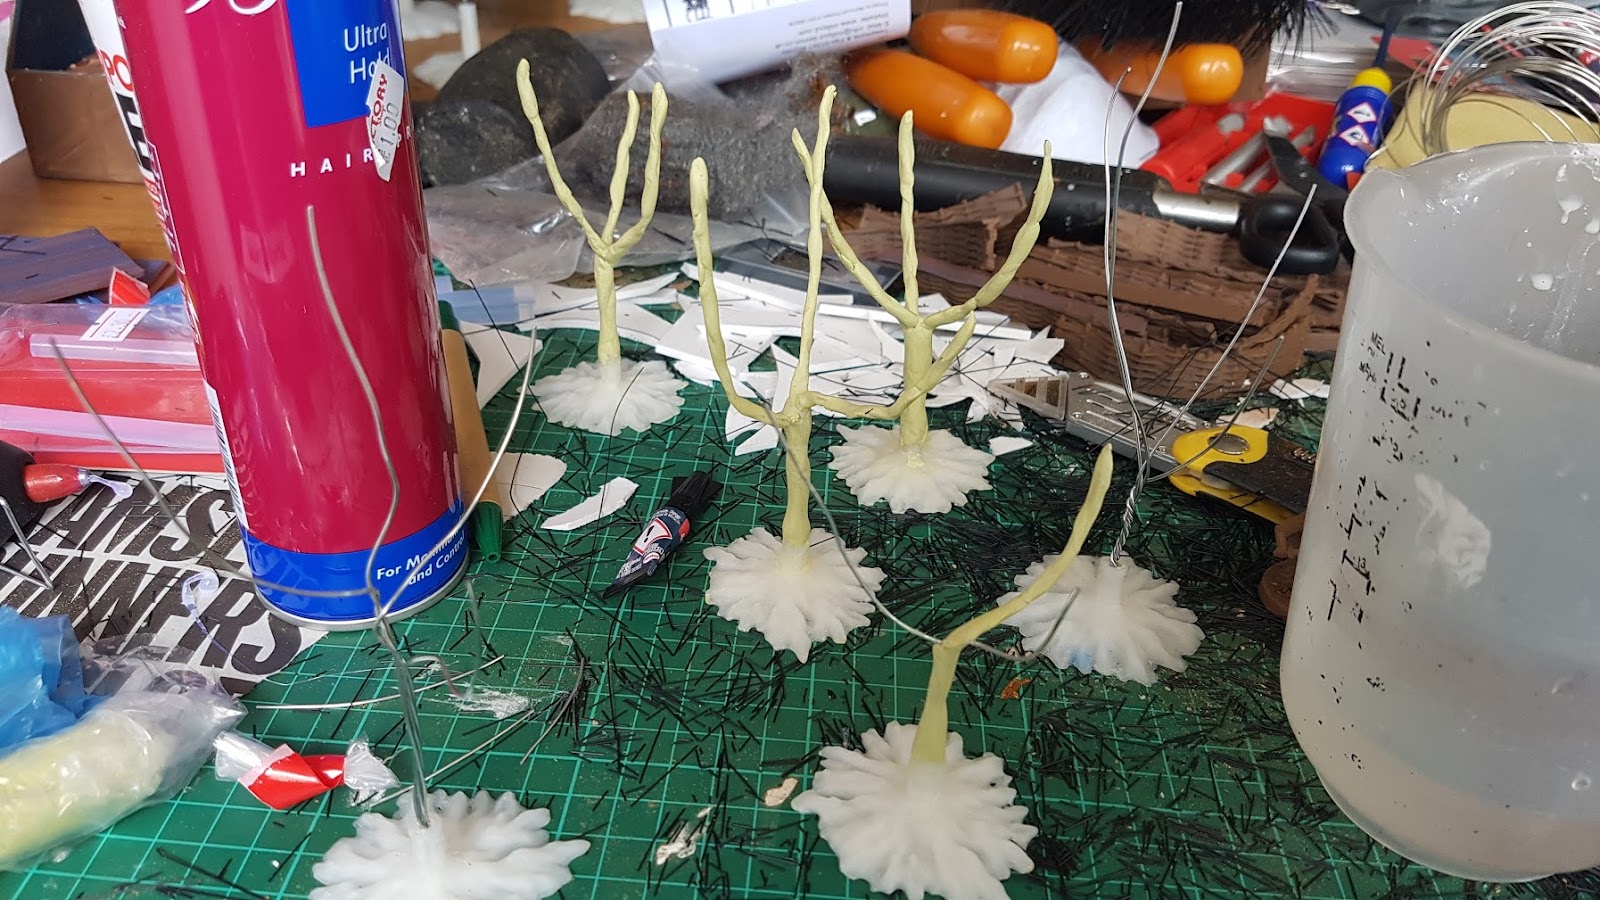
In the lower left of the picture you’ll see Step 1. Take about 3-4 equal-length strands of florist’s wire (available very cheaply) together in a bunch and tightly twist together the bottom 2-3” together several times. You’ll need to use some pliers to ensure it twists together tightly enough.
Once that’s done, you’ve formed the trunk that will go to the base of the tree. With the remaining lengths of wire, you can loosely twist them together, splitting them off at intervals and then twisting together those branches. This is forming the main boughs of the tree.
You can see Step 2 of the process on the yellow boughs in the picture. That is milliput, a two-part modelling putty that was pressed over the wires, with a little bit of sculpting applied to the surface to make it look a little more tree-like. Milliput is very easy to work with, and is air-drying.
Once I’d modelled the boughs, I left them all to dry overnight.
Sweet Leaves are Made of These
Once the basic structure of the wire trees was done, the structure for the leafy canopy needed to be applied. Unfortunately I didn’t get a photo of it unpainted, but it’s very easy to describe.

They go by a number of brand names, but these wire wool pads are very easy to find and very cheap to buy.
If the brand you buy has got a soap powder coating, you’ll need to thoroughly rinse the pads with water until that’s all gone before using them.
Once they’re completely clear of soap, gently pull the pads apart into loose clouds. Try not to split them completely, instead keeping it as one, big loose net.
This is then stretched over the boughs of the tree, tugging into whichever shapes you like.
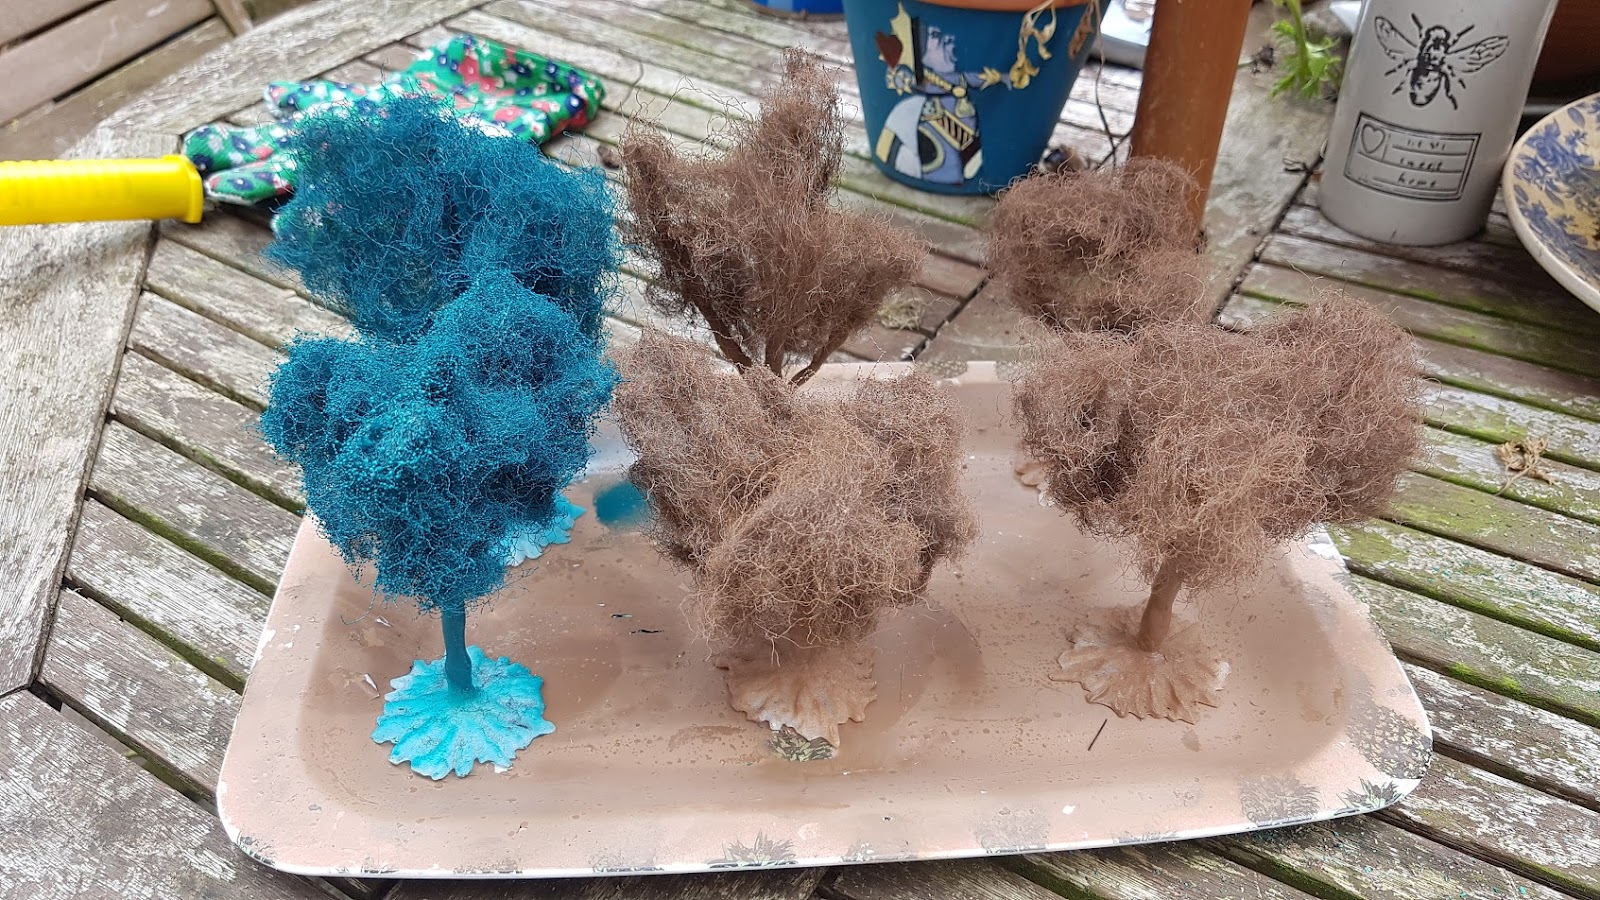
In this picture I’ve already sprayed the trees with my chosen undercoats, but you can see the overall shape and effect of the wire wool step I mentioned above.
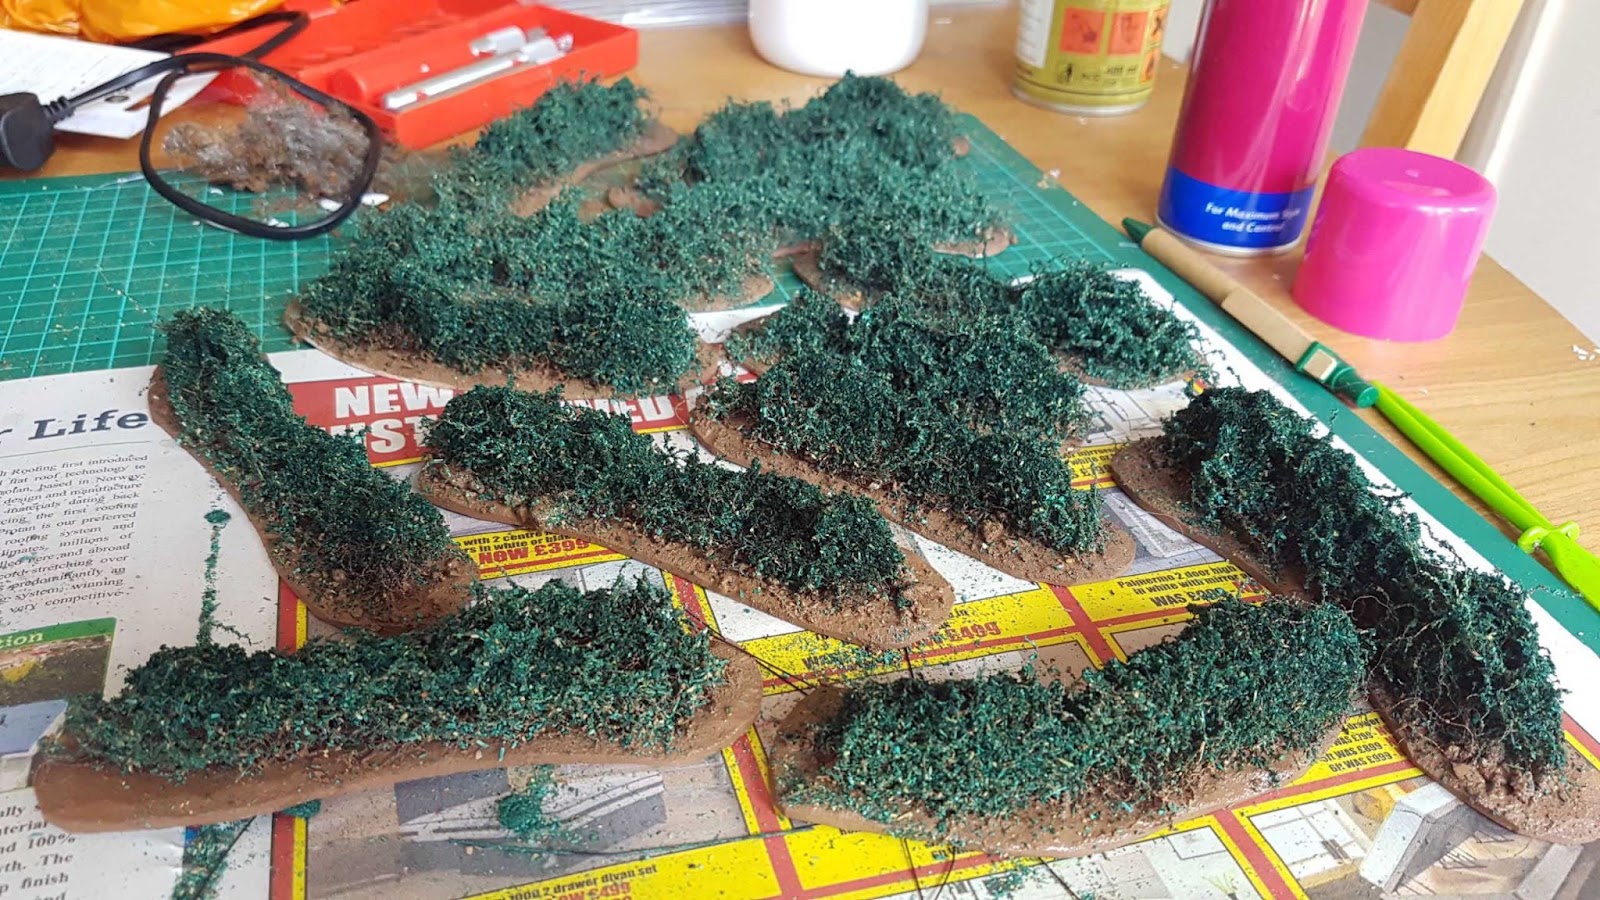
Hedges and Bushes
Using the exact same method, I created sausage-shaped clouds of wire wool and glued them to my hedge bases with hot glue, and rough clumpy clouds glued to round bases to be bushes.
I used similar colours of spray undercoat over the brush trees, which already had their bristles to act as the structure for leaves.
Flock This Way
The last step is to add a variety of different coloured flocks over the undercoated trees. In addition to the flocks you choose (the colours will be the colour of the trees), I recommend getting the following ready:
- A couple of cans of spray adhesive (sometimes sold as “spray mount”)
- A few cans of really cheap “max strength” hair spray
- Some clear plastic carrier/grocery bags. Important that they have no holes in them, and that you have at least one bag per colour of flock you’ll be applying.
- Some latex gloves (unless you don’t mind getting your hands covered in glue!)
Place a generous amount of your chosen flock into the bottom of a plastic bag. You can always recover any leftovers after.
Holding a tree by its base in one hand, liberally coat the whole of the leafy area with the spray adhesive. I mean, go nuts on it. Try your best to get the glue into the deepest parts of the tree (or, at least, as far in as anyone will see).
Hold the plastic bag open wide with one hand and lower the tree glue-end first into the bag with the other, being careful not to get it stuck on the side if possible. Close the bag around your wrist and hold it shut, then shake it like crazy! Try to coat the whole tree in the flock, getting it to go into the deeper bits as well.
Take the tree out of the bag and give it a look. You’ll see the results immediately. If you think there are areas that could use some more density of flock, you can spray on some more adhesive and repeat the process.


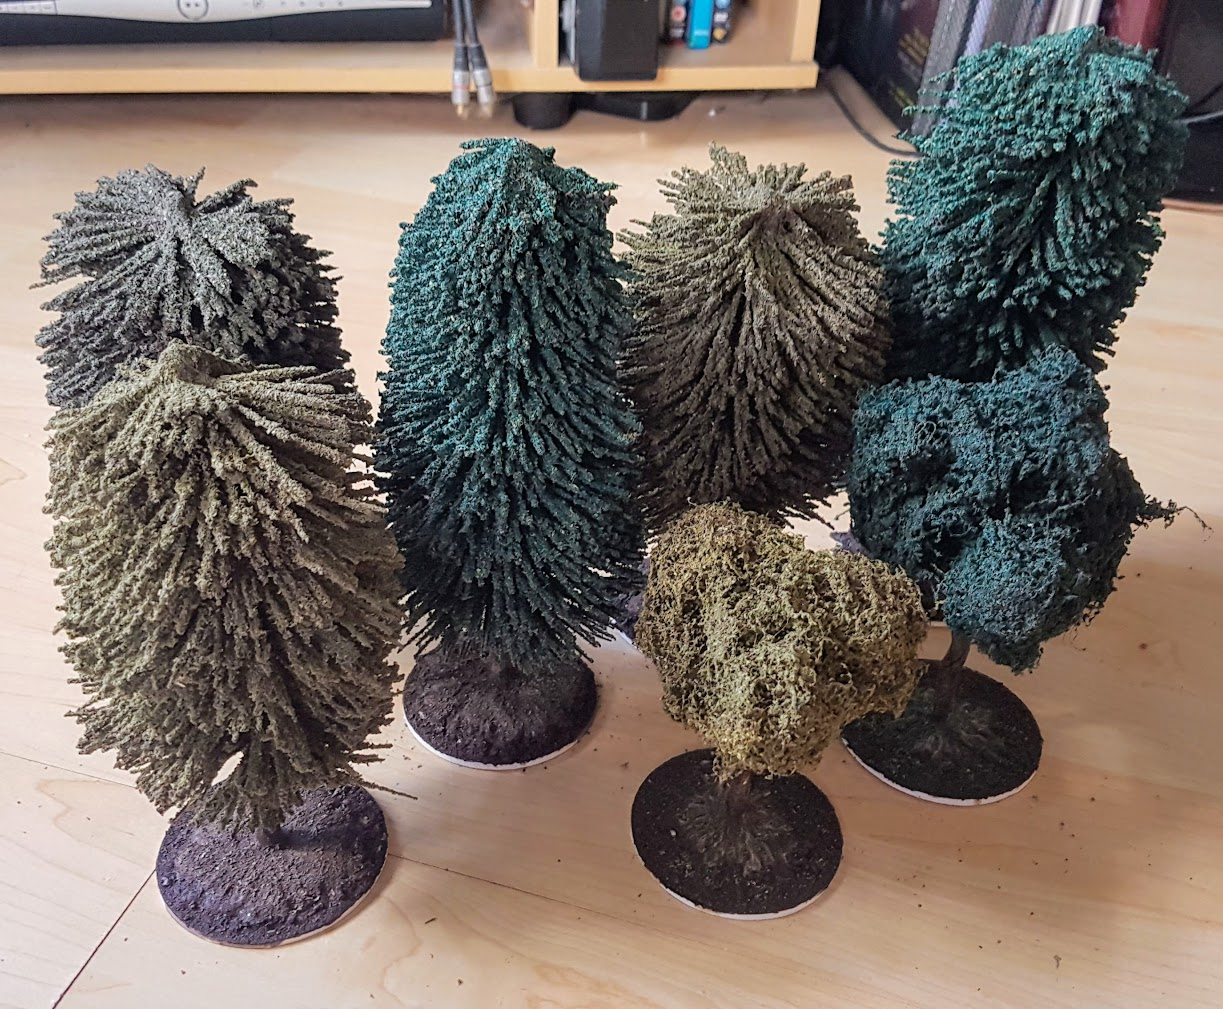
You can see from these pictures that I chose a wide range of different flock colours, but mainly muted natural colours. This allows me to use them on bright green Warhammer battlefields or in dingy Mordheim graveyards as/when I need them.

I repeated the same process for the hedges and bushes!
Once this is done it’s VERY important to seal them. The glue alone will not be enough to keep the flock attached to the trees. That’s where the hair spray comes in! Repeatedly coat all the trees, hedges and bushes in heavy coatings of the hair spray (the stronger the better). This will help the flock to cling to the structure.
Once dried, I even followed this up with a liberal spray of watered-down PVA for extra hardness and durability.
So, it’s not going to win any prizes for the most elegant terrain. But, even using the same methods, taking a little more time and care over it than I did could yield an even better looking result. I now have multiple large crates full of passable battlefield terrain for a fraction of the cost of buying the pre-made equivalents, with heaps of leftover material should I need any more.
Next time you need a batch of trees, maybe consider making them yourself?
Thanks MrLlamatastic! Check back next week for another Hobby How To!


One thought on “Hobby How To – Trees and Hedges”